UK
UK FR
FR DE
DE IT
IT ES
ESGUITAR PAINT GUIDE – NITRO SPRAY SUNBURST
- The Guitar Fabrik
- PAINTING USER GUIDE
- May 15, 2025 views
- 207
A gradient finish that radiates from the center, adding dimension and vintage flair to the body. Everything you need to recreate this finish is right here: &
Please take a moment to carefully review these instructions. They provide a clear overview of the process and help you avoid common mistakes. For a deeper understanding, be sure to explore the other building and painting guides available in our blog section, which offer valuable tips and techniques to enhance your project.
PREPARATION
Before Starting
• Always be very careful with your body and your sleeves. It’s easy to cause a bump, scratch, or drop of polish. Don’t rush.
• Make sure your environment is always clean. A common issue is applying stain or varnish in a dusty setting, which results in an imperfect finish.
• Don’t varnish the fingerboard unless you know this is your preference. Normally, we apply nothing or just a little lemon or mineral oil (for Rosewood or Ebony) to maintain a comfortable feel.
Useful Products Available on The Guitar Fabrik
Only the strictly necessary tools are listed here. However, you can always enhance your result using additional tools and adjustments. These require experience in lutherie and are not covered here.
 | A range of sandpapers, P240, P400, P600, P800, P1000, & P1200, for sanding and polishing. Use them throughout the finishing process, especially for initial sanding and final polishing. |
 | Recommended: The adhesive copper tape will prevents electromagnetic interference from pickups and improves sound quality. |
 | Recommended: A 240-grit sanding block will be used in both during the early sanding and during the final polishing stages. Attach different grit papers to suit your different needs. |
 Gloves | A pair (or two) of rubber gloves to protect your hands during some finishing stages. |
 Painting Brush | Optional: A wide brush will make the applying of a grain fille, a dye or a varnish evenly, easier. |
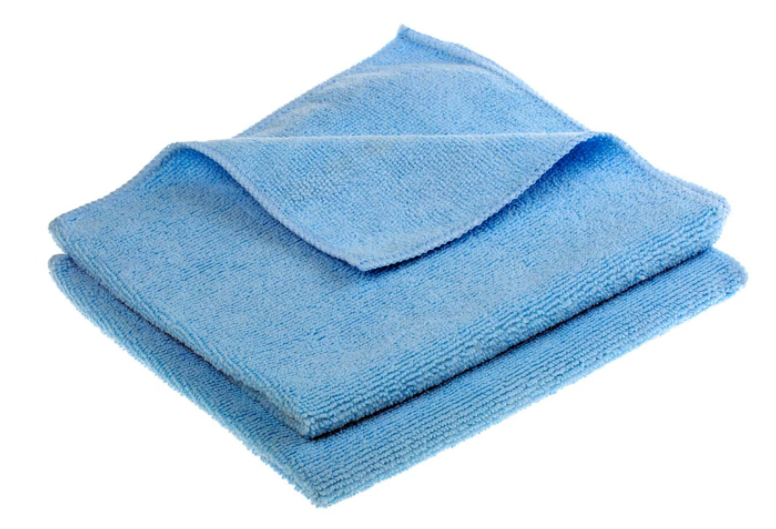 | Optional: It will be used for applying a dye, a Tru-Oil finish, a polishing product or to clean & wipe your guitar neck and body. A microfiber cloth is recommended. |
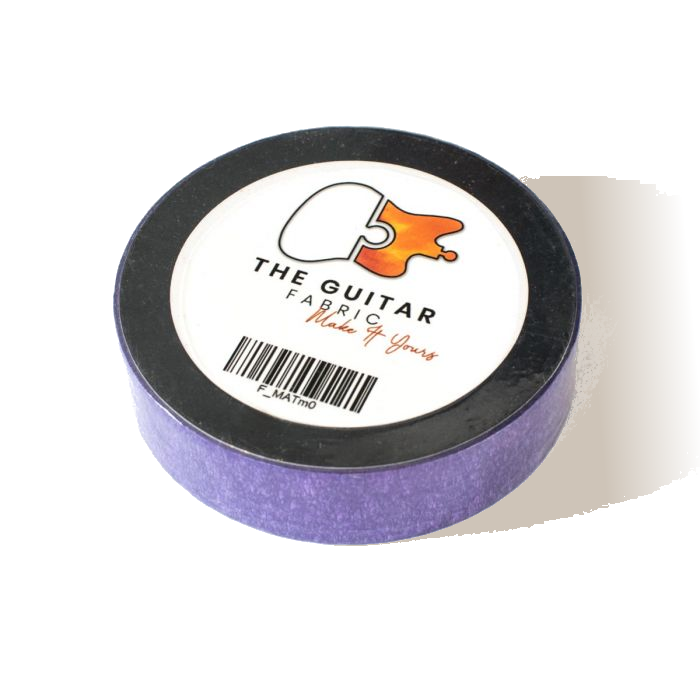 | It will be used to protect areas like the fretboard or bindings that shouldn’t be painted or sanded. |
 Plastic Card | Optional: Useful for smoothly and evenly applying th grain filler. |
 Vacuum or Air Spray | Optional: Useful during sanding to remove dust and keep the workspace clean. |
 Fan | Recommended: For dry sanding during the final polishing phase. |
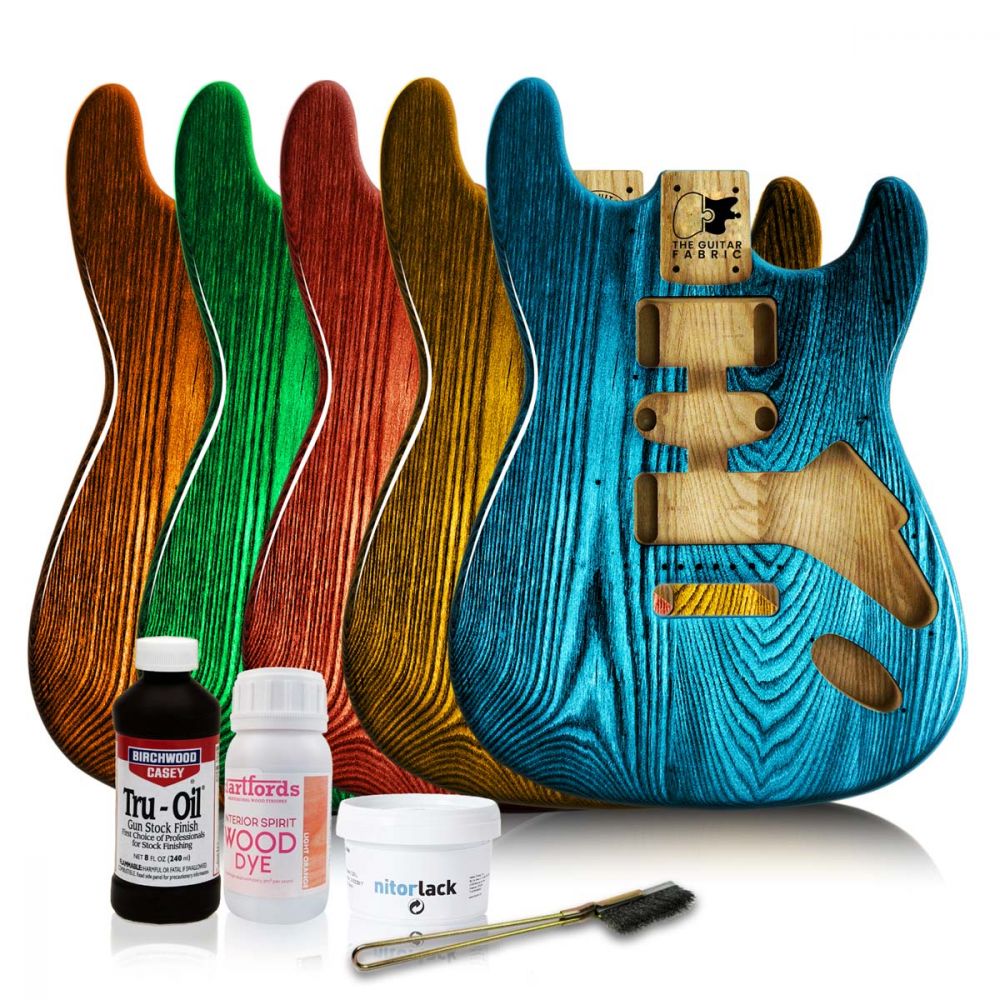
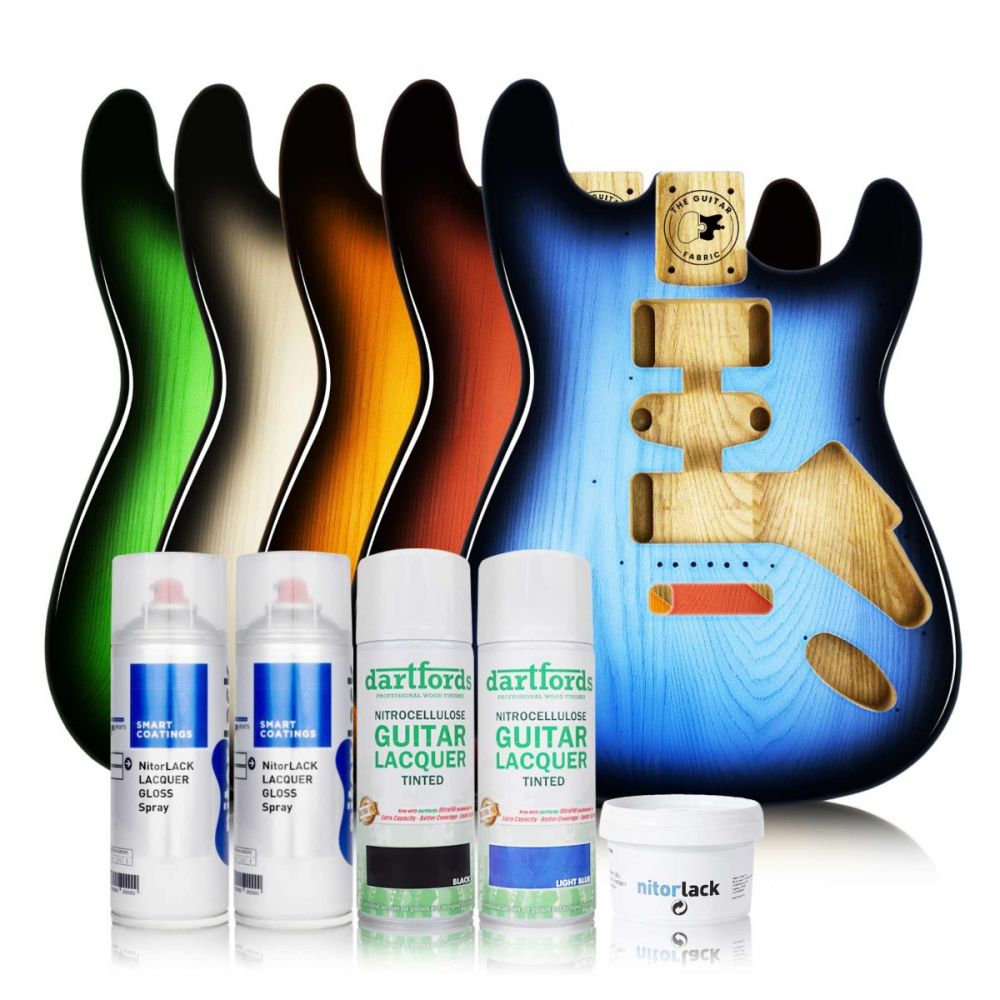
With the Sunburst paint kit, here is the list of tools and consumables you will receive:
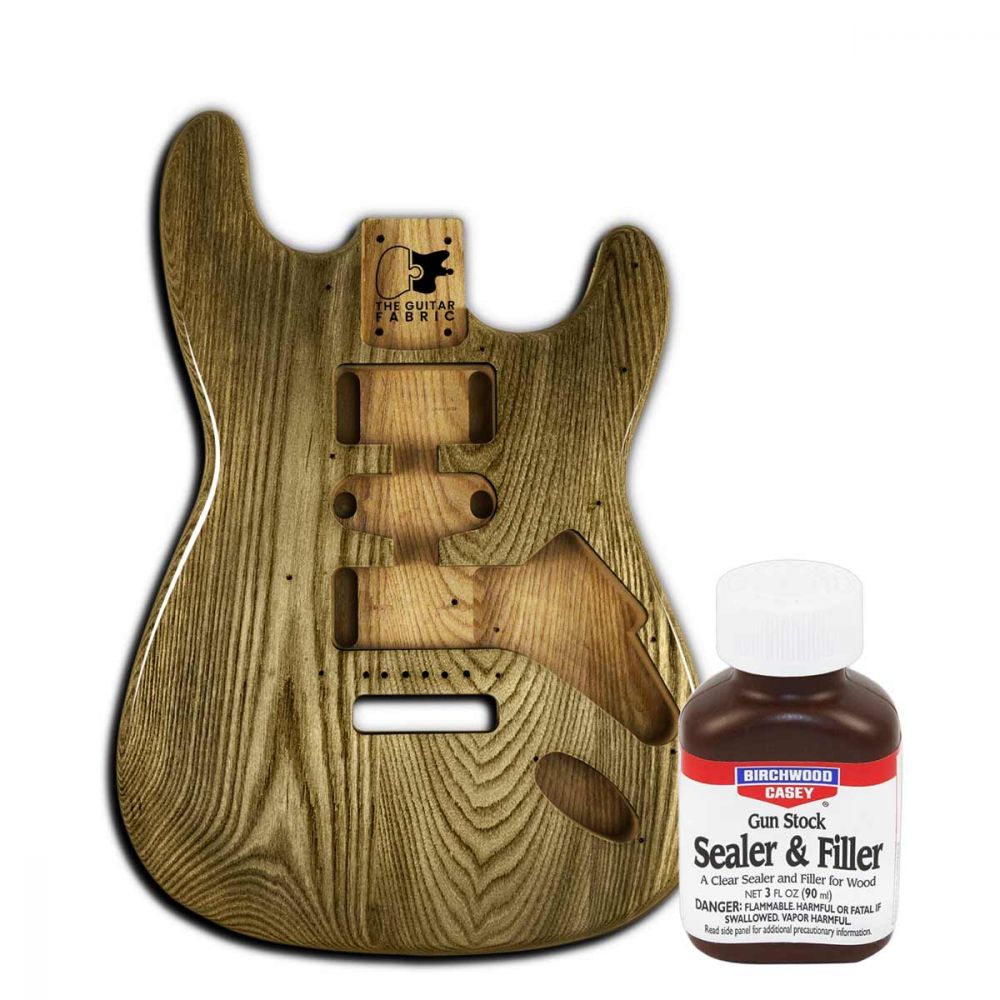
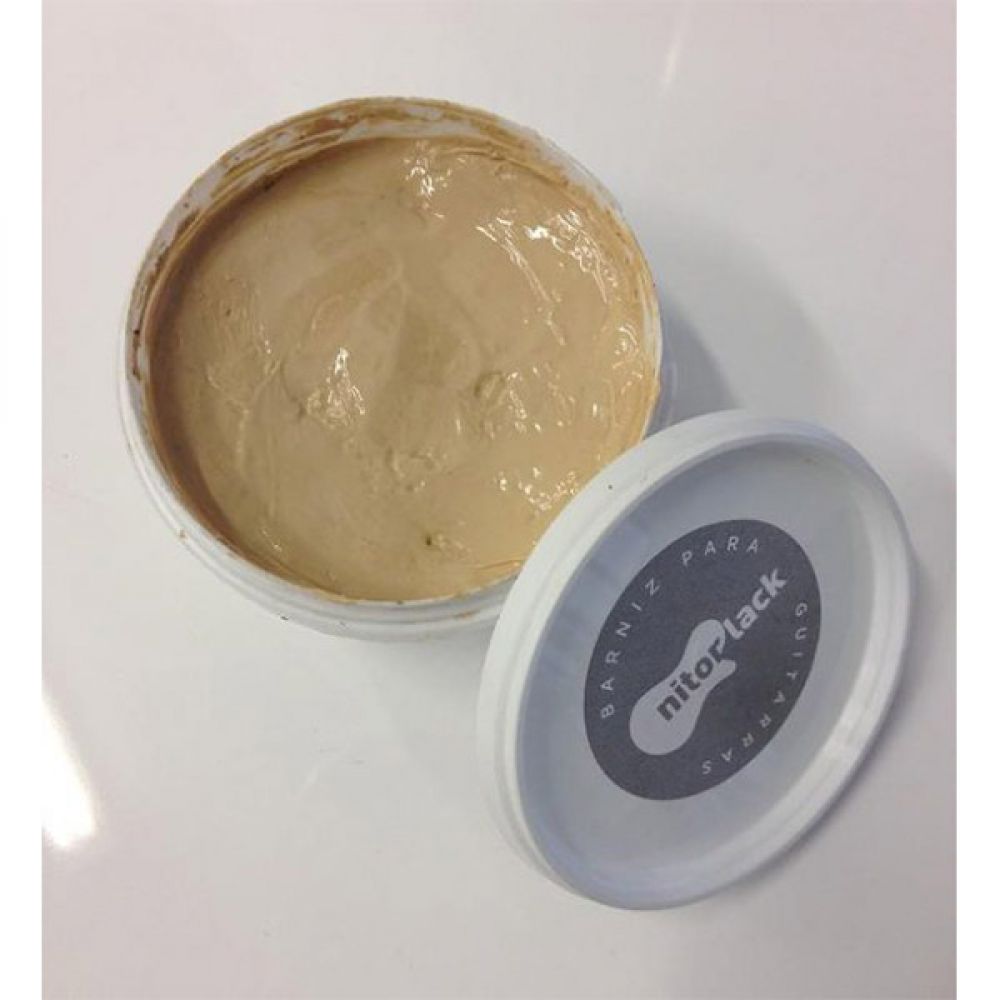
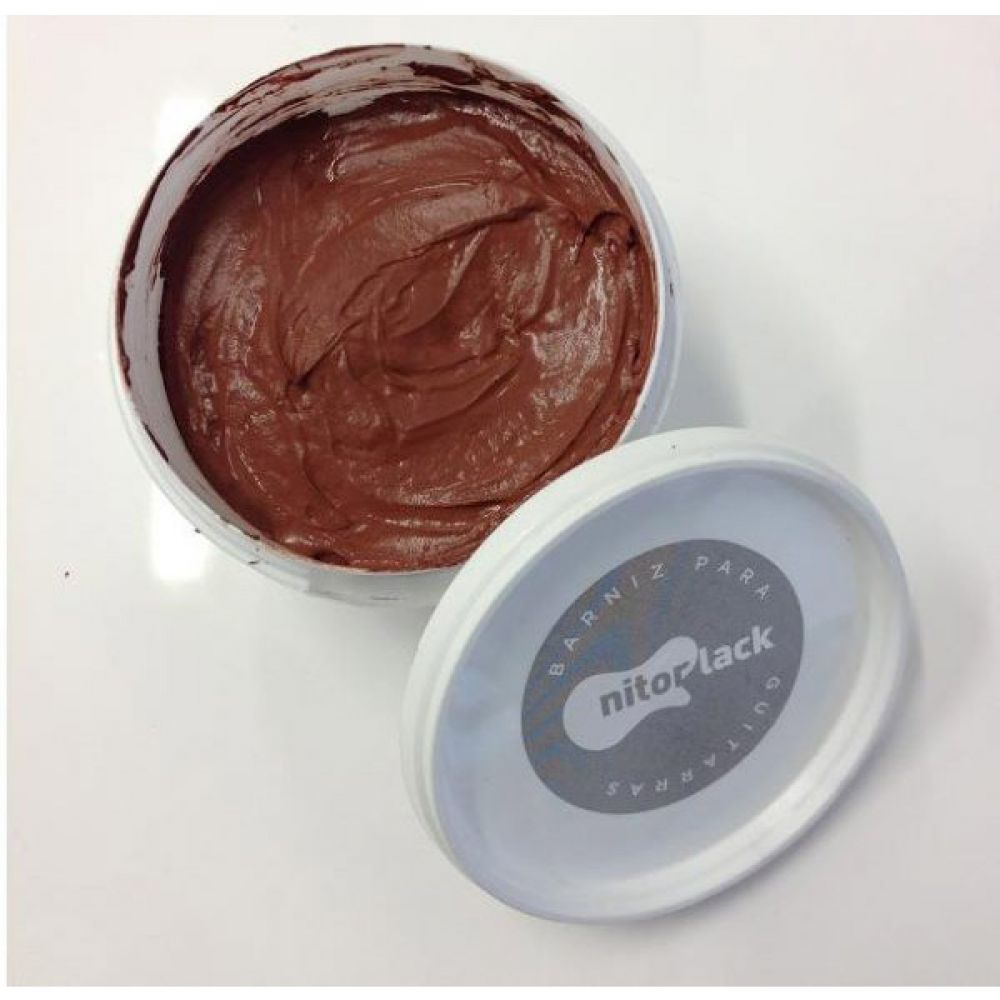
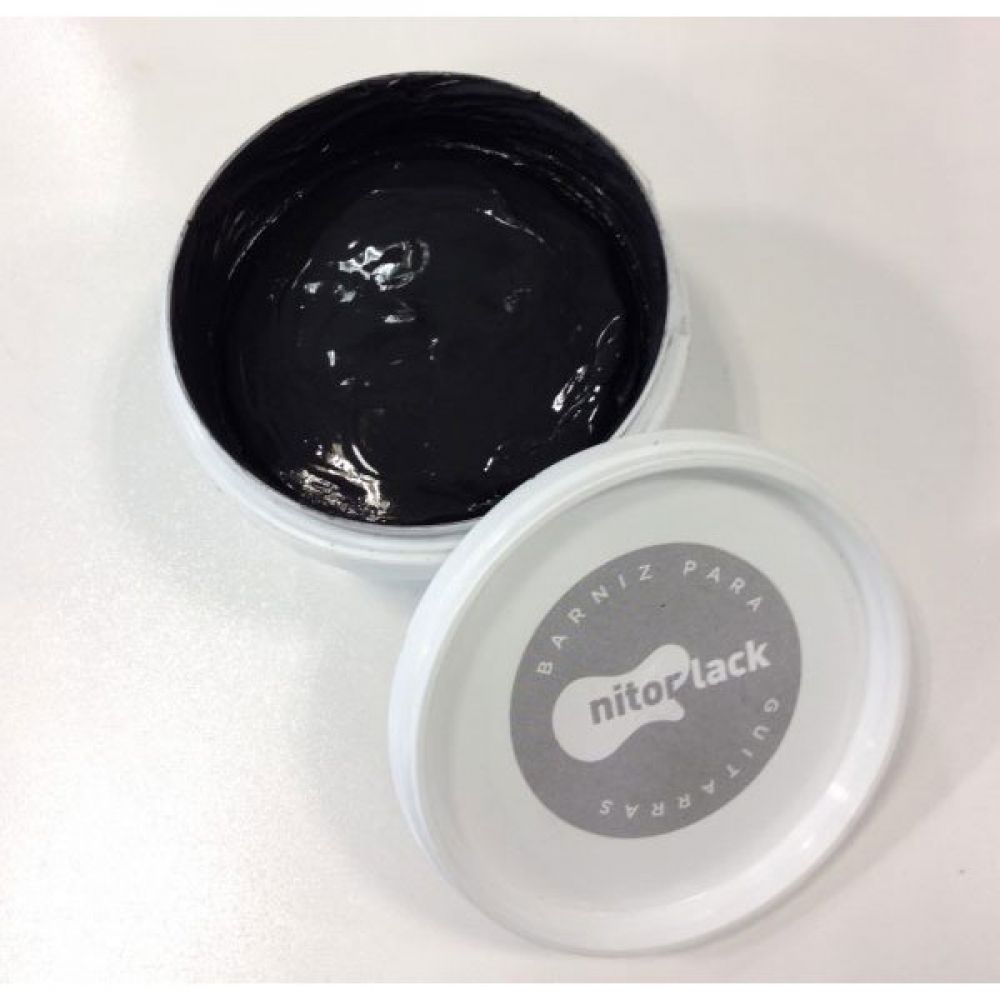
The grain filler will be used to colorize the grain of your wood by blending it with one of the stains you ordered. It also helps to close the open pores of the wood. | |
The clear primer will be used between the wood stain and the vein stain. Its application makes the liming technique easier to control. | |
The dye will be used to dye the body and / or the neck to color your guitar as desired and enhance the beauty of your guitar wood. | |
The varnish will be used to highlight your finishes and protect your guitar and finishes over the years. |


OVERVIEW OF THE FINISHING STEPS
Here are the steps to follow to achieve the expected finish using your kit:
- Working environment
- Wood preparation + sublime effect preparation
- Grain filling application
- Staining of the wood
- Varnishing
- Polishing (optional)
The different methods and practices defined in this guide have been extensively tested. Strictly following the instructions in these instructions for use will lead to the expected results. Although it is possible to do some things differently. This method has been implemented to make it as easy as possible for the user to undertake the finishing of his guitar and to obtain a professional result as desired and at a lower cost.
WORKING ENVIRONMENT
To get a clean and professional finish on your guitar, it's essential to prepare your workspace and tools properly before starting. Here’s how to set up your painting environment.
Choose a stable indoor space:
- Work indoors in a clean, dust-free and well-ventilated room.
- Avoid outdoor areas to prevent contamination from wind, insects or humidity.
- Let the guitar wood rest in this space for 48 hours before finishing to adjust to temperature and humidity.
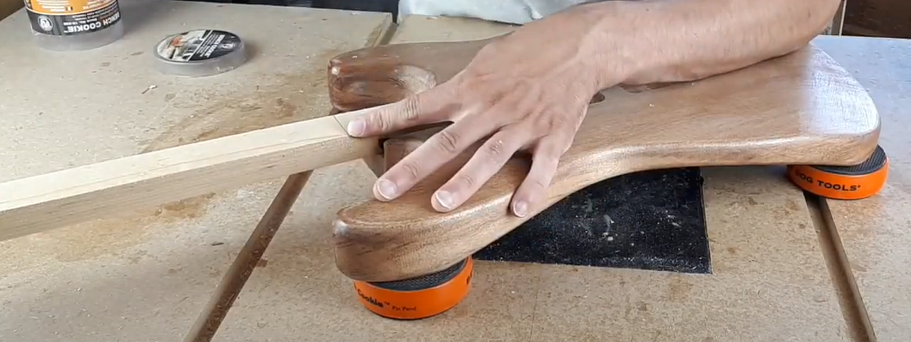
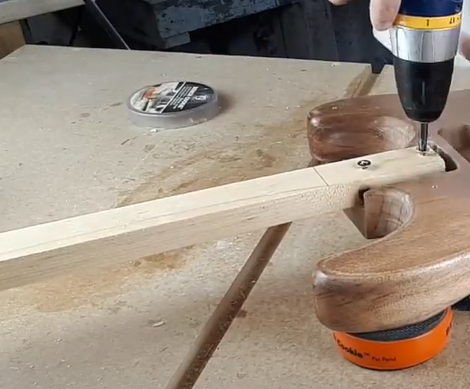
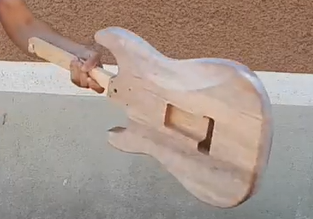
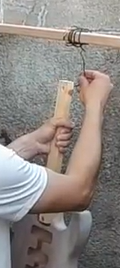
Prepare how you'll hold the parts:
- Hang the body and neck using screws or hooks through strap button or tuner holes.
- For spraying, fix a stick into the neck pocket to hold the body safely while working.
- For sanding and manual staining, lay parts flat on padded surfaces like foam or cushions.
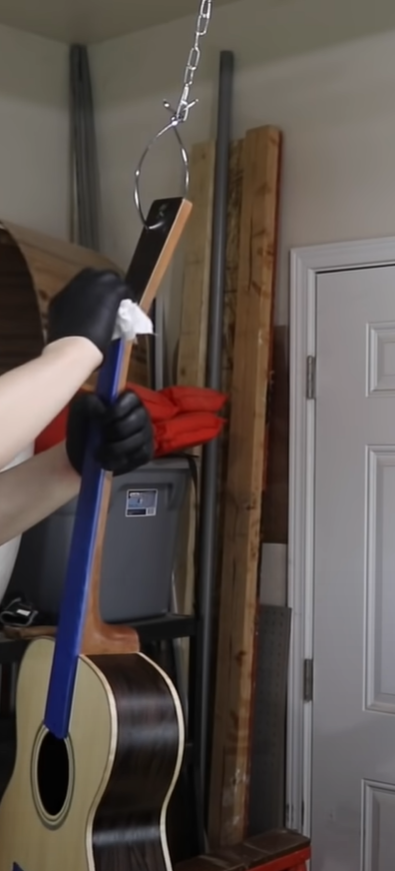
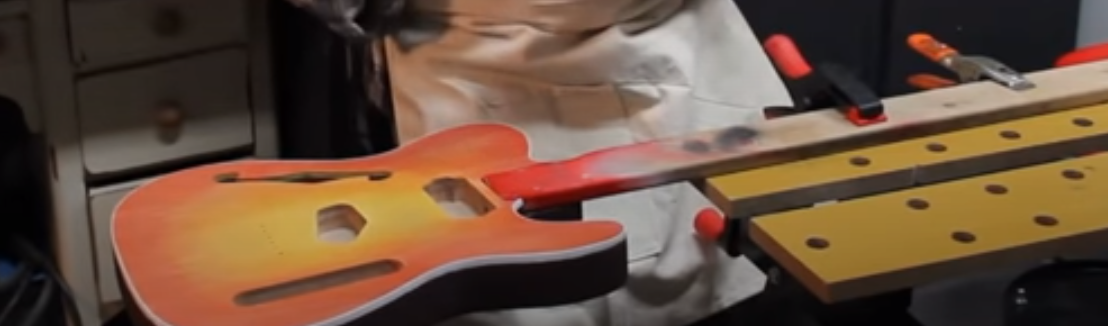
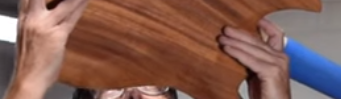
You can also fix the body to a piece of wood. This allows you to hold it in your hand when finishing with a spray or to put it in a clamp :
Plan your workflow:
- Decide where each step will take place: staining, spraying, drying, etc.
- Allow enough space for parts to dry between coats, without touching anything.
- Expect the full finishing process to take from one to four weeks depending on the products used.
Check your materials:
- Make sure you have all the tools and products listed in your finishing kit.
- Read through all steps and instructions before starting to avoid surprises mid-process.
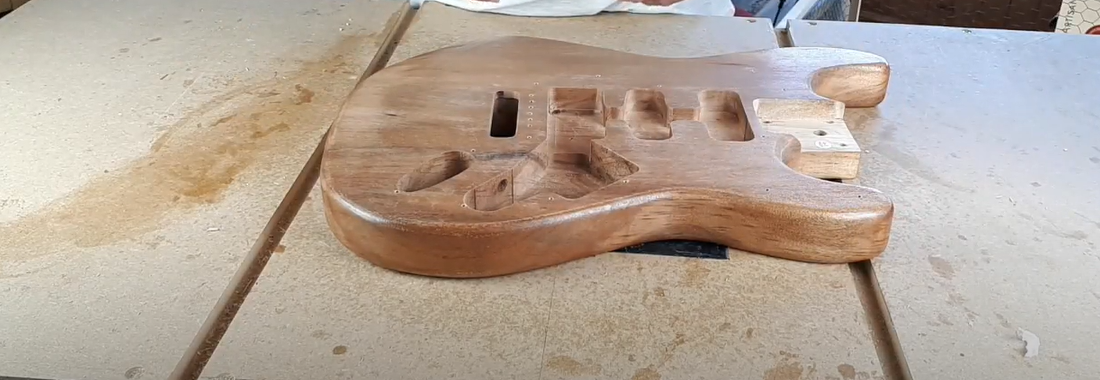
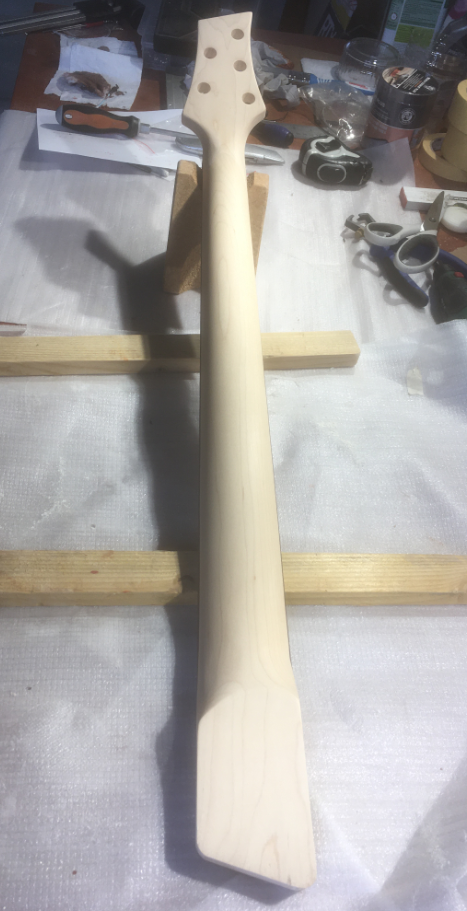

WOOD PREPARATION
Glue Stain
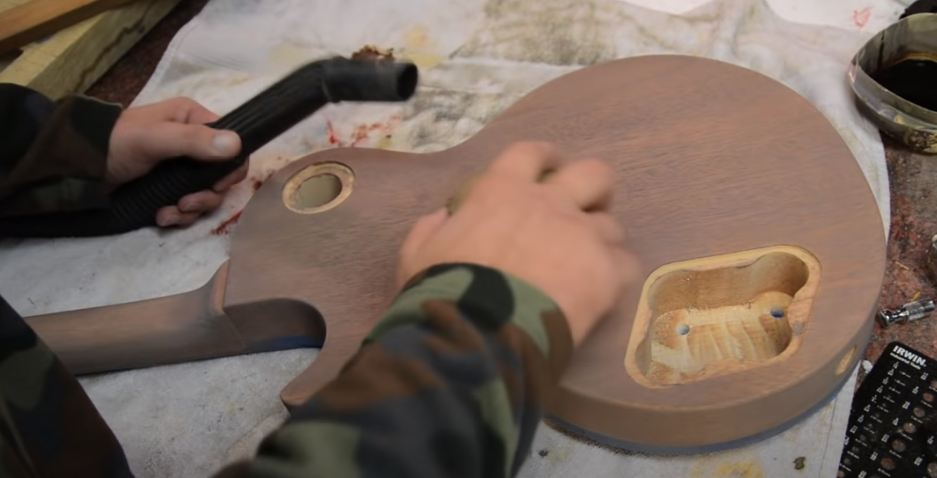
Before starting the finish, take a close look at your guitar body. If you notice any glue stains, remove them gently by hand-sanding with P240 to P400 grit sandpaper. Sand gradually and evenly, checking your progress regularly — the goal is to eliminate the stains while removing as little wood as possible. Also take this time to inspect the entire surface for any dents, scratches, or rough areas. Smooth them out with light sanding if necessary, as these imperfections may become more visible once the finish is applied. Finally, make sure all the contours and edges of the body are clean and well-defined, especially around routed areas, cavities, or binding. A clean surface is essential for an even grain-raising step and a flawless final result.
Raising the Grain (optional)
This step is optional but recommended for mahogany or ash when using water-based products — especially with our translucent kits. It helps achieve a smoother finish and reduces paint consumption, particularly with nitrocellulose or opaque polyurethane finishes. Skipping it won’t ruin your result, but it may slightly affect the final texture.
When water or water-based products contact bare wood, the fibers swell — this is called “grain raising”. Once dry, the surface feels rough. Since this effect is unavoidable with water-based finishes, it's best to control it before applying your stain or sealer.
To do this, dampen the wood evenly with a sponge or cloth and let it dry completely (ideally overnight, or at least 4–5 hours in warm, dry air). Then sand lightly with P240 grit paper — just enough to smooth the raised fibers without going too deep. Worn or slightly dull sandpaper works well for this purpose.
If the surface still feels rough, repeat the process with a second round of wetting and sanding, this time using finer grit like P400 for an even smoother base.
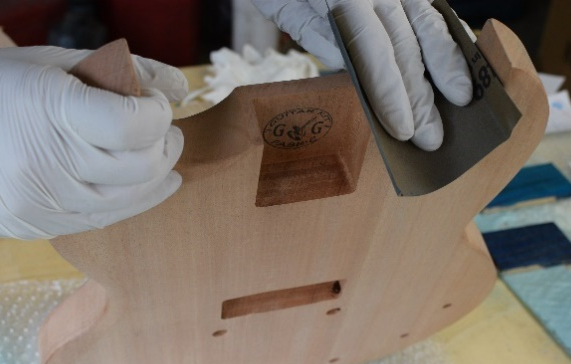
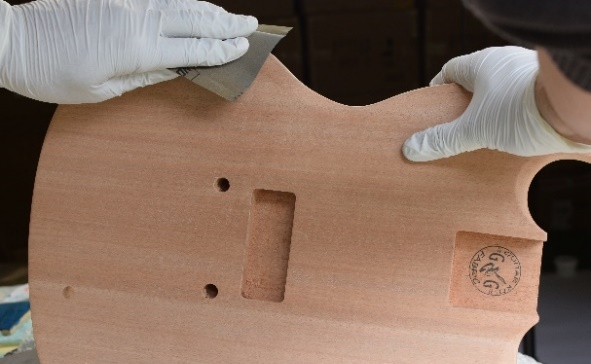
Sanding the Instrument
The purpose of sanding is to create an ideal surface for finishing and to do this we need to create a smooth surface, remove imperfections and machine marks that affect your finish. Note that your body and handle have been pre-sanded with grit P180.
First, here are some important rules to follow during the sanding step:
- Always sand in the direction of the grain (forwards and backwards with the grain) never on the side. For the sides and edge of the body it may be more difficult to sand in the direction of the grain in which case always sand in a direction that you have predefined.
- Sand first with a P240 grit, then P400 in the case of a stain. This step of smoothing wood with different grain levels is important. Each step P240 and P400 has its uses.
- Cavities that will not need to be painted since they will be covered by one of the components, pickguard pickups, etc. do not need to be sanded.
- Sand all flat faces and outlines well, and don't forget the hard-to-reach places. Then clean with a rag or with a fan to remove all dust and wood catfish.
- You should ALWAYS use a sanding block on the flat surfaces of your guitar (or a rotary sander if you have).
- When using the polishing pad or sandpaper clean it often. To do this pat and rub lightly on a rag surface to remove the dust embedded in your sandpaper. When the sandpaper becomes very worn, replace it.
- When sanding the edges of your guitar or delicate areas of the neck, remove the sanding block and simply slide the sandpaper between your fingers against the surface. It takes longer but will result in a better finish and allow you more control.
- When satisfied with your job, be sure to remove all sanding dust and grits with a vacuum, damp cloth.
Sanding by hand: This is a bit of a tedious but essential step and it is important to do it well to get a good result.
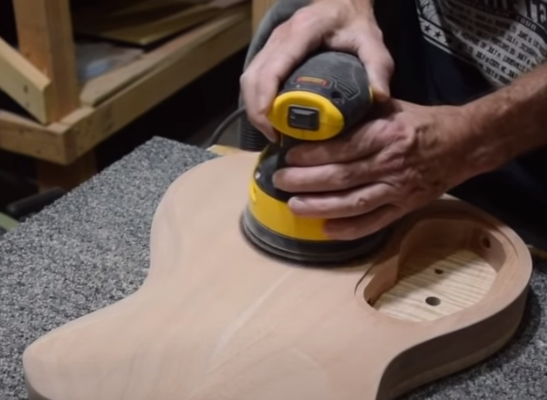
Sanding with a machine: If you have a rotary sander (excentric), don't hesitate - they'll make your life a lot easier. But take it easy!
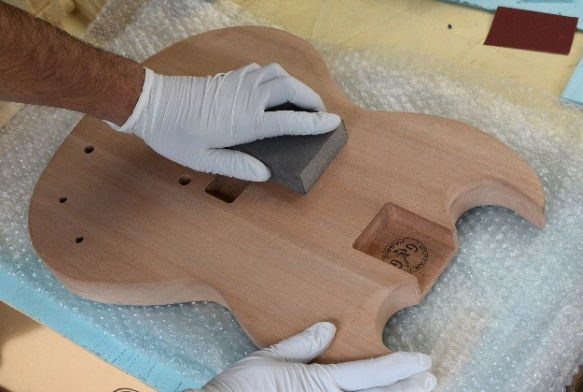
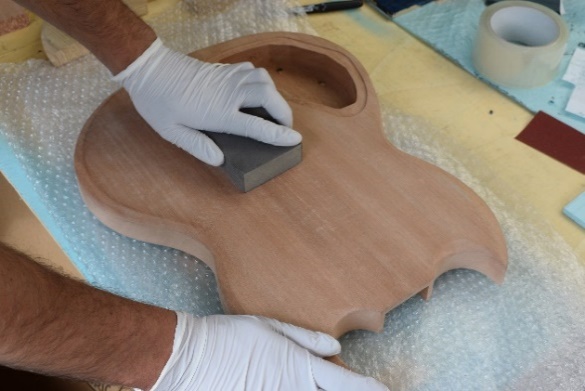
Sanding the contours: A rotary sander is no longer appropriate here, as it can easily round off or damage the delicate curves and edges of your body. Switch to hand sanding with a soft block or flexible pad to maintain control and precision. Once your contours are smooth and consistent, you're ready to move on to the next step: applying the grain filler.
Tip: For sanding guitar edges and contours, flexible tools like a foam tip, rubber eraser, cork block, or even a thermal insulation sheath wrapped in sandpaper conform easily to curves, offering better control without flattening rounded areas. Mixing these lets you adapt quickly to different shapes while staying gentle on the wood.
APPLYING GRAIN FILLER
General Information
Wood filler especially important for woods with open pores such as ash and mahogany. The filler will allow you:
• Use less paint or varnish because, without the pore filler, the lacquer will clog instead of the pore filler.
• Smoother and smoother finish without small pinholes
• It can also be used at the same time to pre-color your wood: black stain, mahogany, neutral wood, etc.
• It will allow a better quality finish less expensive.
Apply Wood Filler Before, After, Or Mix With dye: The guitar maker suggests either applying mixer with a wood filler or after the filler. The choice depends mostly on the intensity of shade you are looking for. You have three levers to control the intensity: dilute your dye more or less with white spirit, apply more or less layers of dye; and finally fill the pores to a greater or lesser extent (this having the pores open when tinting, which can be obtained by mixing the pore sealer with the tincture). If you want to mix your stain with the sealer, we recommend that you use a (to stay as close to the color of your stain as possible) with some tincture and white spirit.
The consistency of your final mouth pore - whether or not to mix with tincture - should be a little more runny than melted caramel and a little less than custard.
Preparation
To apply the pore filler we invite you to wear gloves although this is not harmful. We suggest that you mix our mouth pore with a little water. Let's say 10-20% lukewarm water. This will allow for easier application and avoid creating patties that would have to be sanded down painstakingly.
Application
To apply the pore sealer you can either use a cloth or a plastic card. Our preference is to use a cloth for its application and a plastic card to remove the excess while rapping.
Collect the pore sealer with your cloth and rub, pressing firmly in a circular fashion throughout your body (and handle, if you have decided to sublimate and fill the grain of your sleeve). The idea is indeed to fill the pores and you can imagine that you have to push the sealer into the pores, the interstices of the wood.
Surface, wait 2-3min, no more, then scrape off the excess pore sealer from the wood surface with a plastic card provided. The goal is for the mouth to only pore in the interstices and thus maintain a smooth surface. It is preferable to grate perpendicular to the direction of the grain so as not to remove the filler lodged in the interstices of the veining. Then do the other surfaces in the same way. In more difficult-to-scrape areas you can use a clean cloth in place of a plastic card to remove excess sealer. Remember to treat the edges as well. These areas are easy to overlook.
Once all the surfaces are done, let dry for 1 hour then sand with P400 grit sandpaper as defined in the previous section above. Be careful not to sand too much. You don't want to remove the sealer you just applied. Sand the edges carefully as well.
Finally, inspect your work. You can easily see if all of the pores are filled by looking at the surface at an angle, against bright light radiating obliquely toward the surface. If you missed any areas, you can always reapply wood filler.
Manage the bindings: The bindings should have been carefully masked off before you began painting or finishing. Once the rest of the guitar is complete, you can remove the masking and inspect the bindings. If any finish has bled over the edges, use a sharp blade or fine polishing tools to clean them up gently. This final step adds a professional touch, highlighting the clean lines and craftsmanship of your instrument.
NITROSPRAY PAINTING
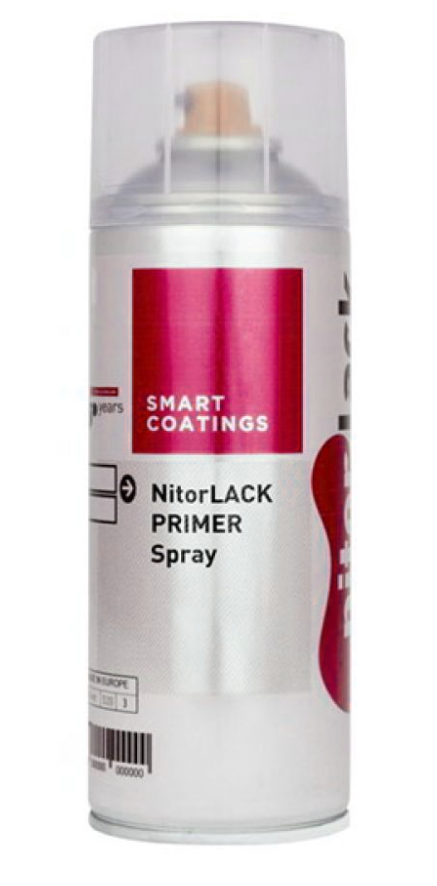
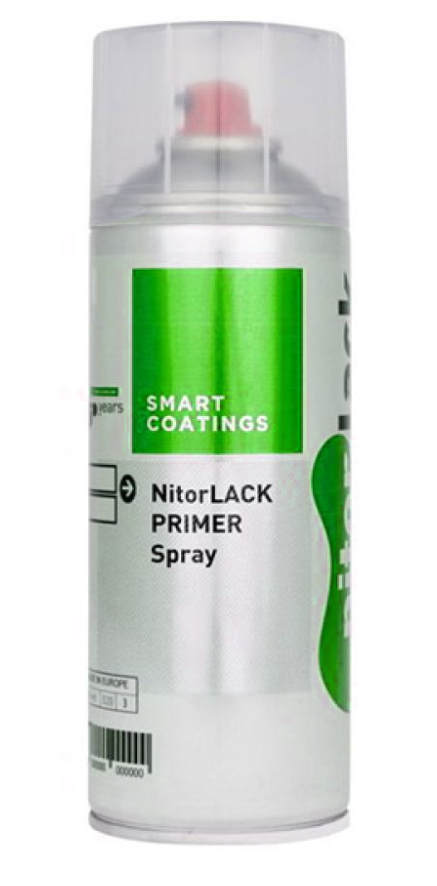
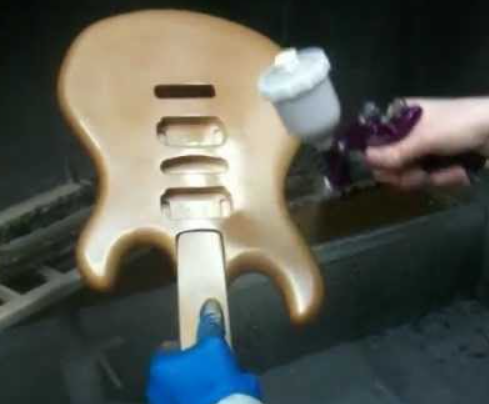
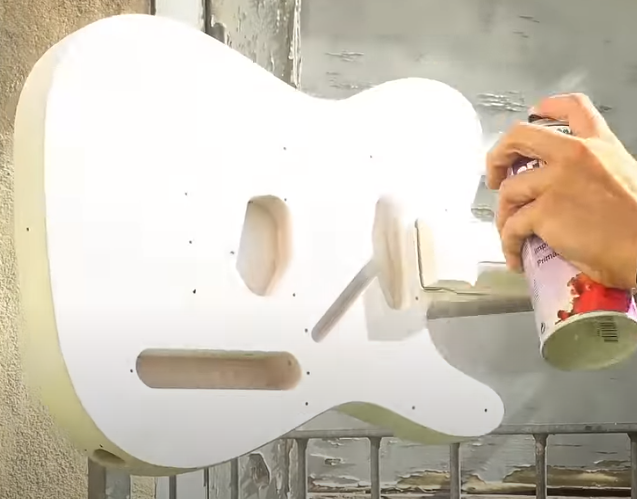
Primer Application
- Sand previously with P600 grit before applying the primer.
- Before using the , make sure it has been stored at room temperature (for paint fluidity).
- Shake vigorously for at least 3 minutes.
Caution: Nitrocellulose paint is highly toxic! Please wear a mask, gloves, and be in a well-ventilated area, such as outdoors or an open garage, with proximity to fresh air. Avoid keeping the fumes in an enclosed space.
Apply 2 to 3 thin coats for the body and 1 to 2 thin coats for the neck if you choose to paint it. It should not be necessary to sand between coats unless you have drips, runs, or nibs. In such cases, use P800 grit sandpaper.
Once finished, you can very gently sand with P800 sandpaper, applying almost no pressure. The goal is not to remove material or paint but merely to smooth very lightly and remove minor imperfections.
Color Application
Just like with the primer, it's now time to apply your colored . Work in a well-ventilated area and spray in smooth, even strokes, maintaining a consistent distance from the surface. Apply 2 to 3 light coats on the body, allowing each layer to dry thoroughly before adding the next. If you're planning to paint the neck as well, 2 thin coats are usually sufficient. Once the color coats are complete and fully dry, you can perform a very gentle sanding with P1000 grit sandpaper to smooth out any small imperfections or dust particles—being extra careful not to burn through the color layer.
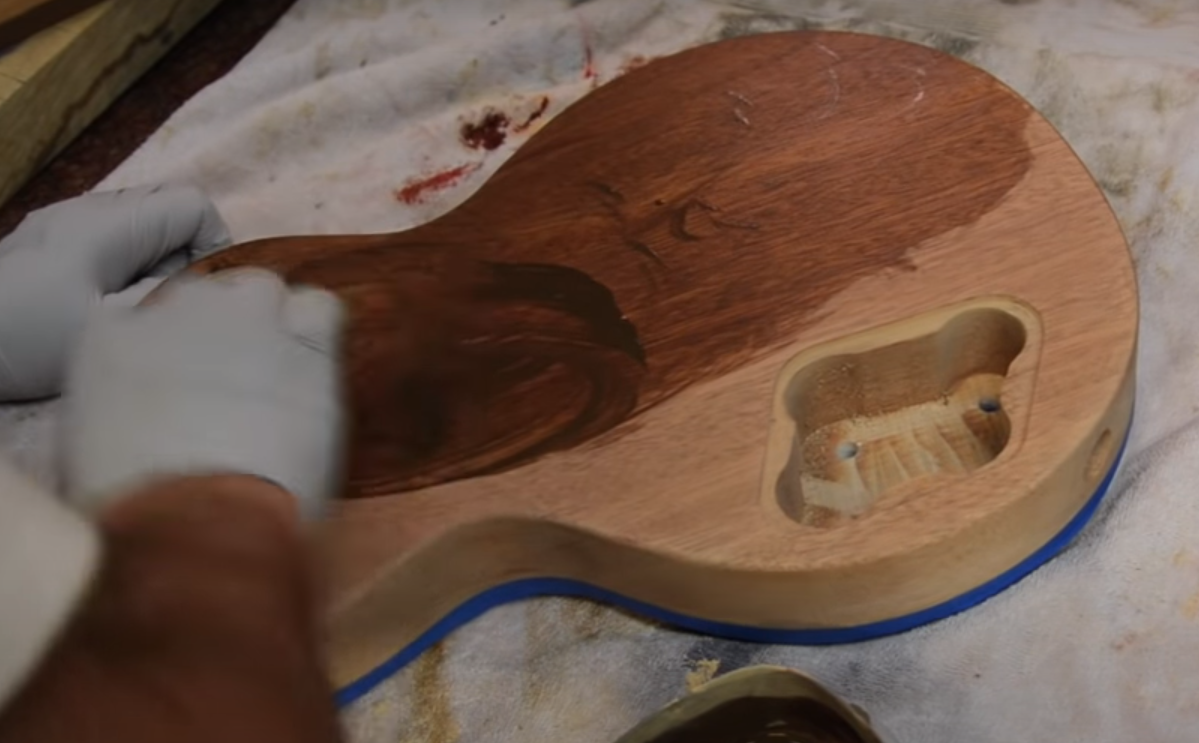
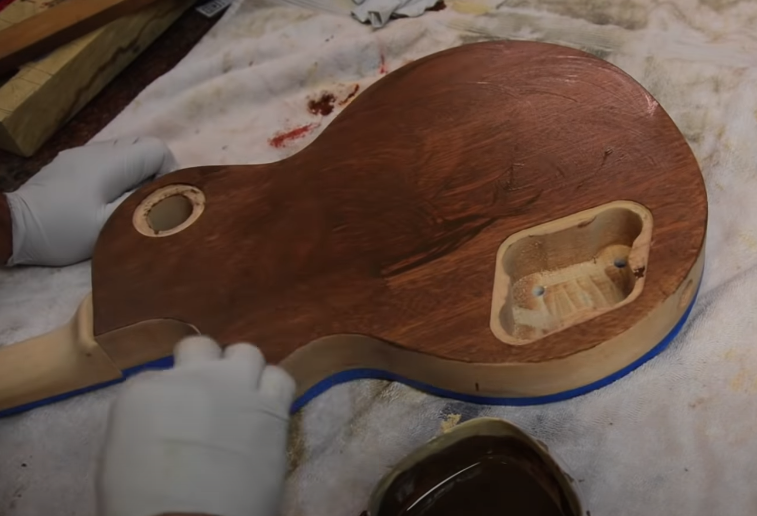
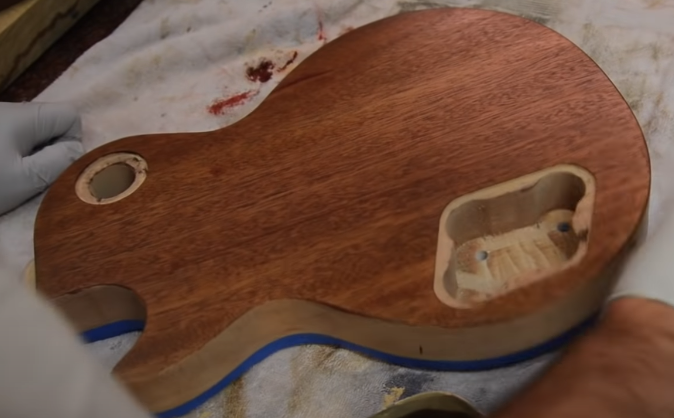
CREATING THE SUNBURST EFFECT
To create a sunburst effect you should first use the stain for the center of the body. Then apply the stain to the edges and move from one to the other in small strokes, diluting with white spirit for good control of intensity and degradation until you get a satisfactory result. Note that you can always practice on scrap wood or on a mahogany or ash sample if you have ordered one. Concerning the process you have 2 possibilities:
1. If the stain used on the edges is much darker than the stain on the center of the guitar
Start with the center following an imaginary boundary that makes sense: about 2cm from the edge of the guitar. Start with a light dilution with white spirit, for example 1:2 (1cl dye to 2cl white spirit). You can always increase the intensity later. Then apply the darker stain to the edges, diluting in the same way. This time if we suggest 3cm from the edge to the center. So you should have about 1cm where the dyes overlap.
From there you will have to adjust little by little trying to create the desired gradient: start from the edges to increase the intensity to go to the center changing of course the dye in between (for the gradient - where the two dyes join it is also possible to mix your two dyes to obtain the desired colour and thus to perfect your gradient.
2. Case where the dye used on the edges is much darker than the dye on the guitar center
The same principle can be applied, the main difference being that the two dyes need to meet further apart. For the center you can keep 5cm and 6cm for the sides. Then instead of working from the edges towards the center, you should work from the center towards the edges of the body.
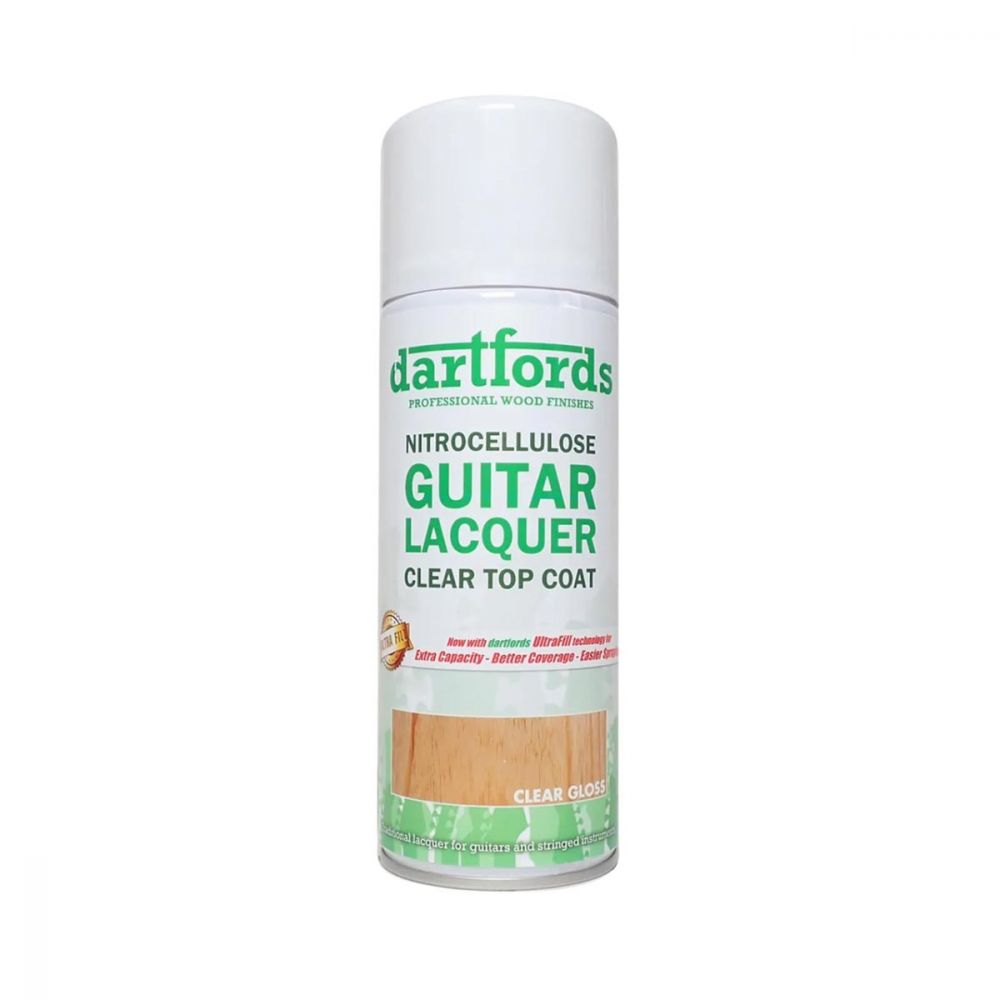
NITROCELLULOSE SPRAY VARNISHING
General Information
Most store-bought electric guitars are finished with polyurethane, but we have opted to provide you with a nitrocellulose spray lacquer ( ). Nitrocellulose lacquer offers a traditional, vintage-style finish that enhances the natural resonance of the wood. However, it requires more care in application and longer drying times compared to water-based alternatives. Please keep in mind the following recommendations.
- Before starting the varnishing step, make sure your wood has been sanded to at least P400.
- Apply very thin coats to achieve an even and smooth finish.
- Applying nitrocellulose lacquer is a delicate process, so take your time.
- Unless you prefer otherwise, fretboards are typically left unvarnished. Instead, consider applying Tru-Oil or lemon oil for better playability.
- Inspect the surface carefully after each coat to detect any imperfections or drips.
Preparation
Before use, shake the nitrocellulose can thoroughly for at least 2 minutes. It is crucial to ensure the lacquer is well-mixed for an even application. Prepare your guitar body as described in the previous sections.
Application
Apply the nitrocellulose lacquer in thin, even coats. Hold the can approximately 20-30 cm from the surface and spray in smooth, overlapping passes. Work in a dust-free, well-ventilated area, preferably with protective gear such as a mask and gloves. 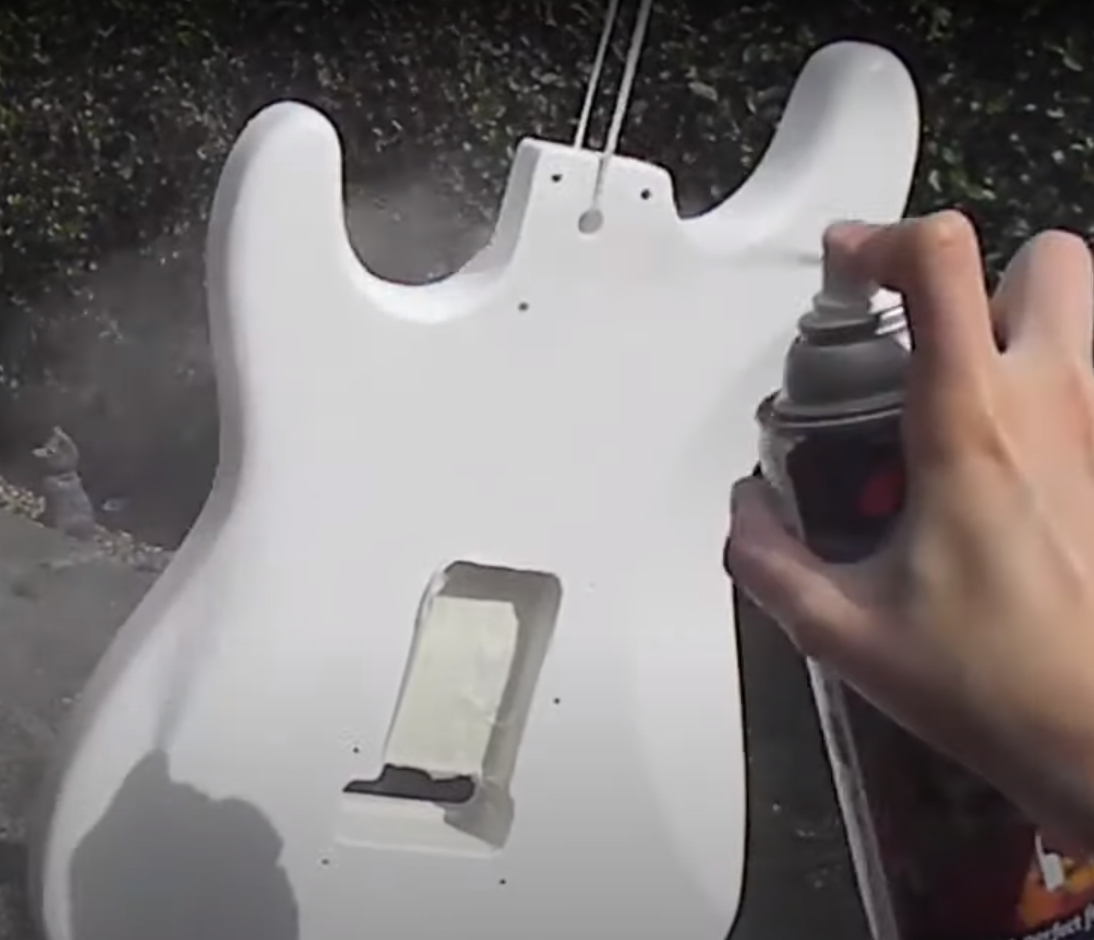
Always spray along the grain direction. Start with the top, then move to the sides and back. Allow sufficient drying time between coats to prevent defects.
For the first two coats, do not sand between layers unless you notice significant drips or orange peel texture. If needed, use P600 sandpaper for minor corrections. Ensure that each coat is completely dry before applying the next one. Given nitrocellulose's properties, drying times will vary depending on humidity and temperature.
For the third coat onward, allow at least 24 hours of drying time before sanding lightly with P800 sandpaper. This gentle sanding helps the next coat adhere properly and ensures a smooth surface.
The final coats should be applied with extra care. Let the lacquer cure for at least 7 days before proceeding to the final sanding and polishing steps. Below is a summary table of the varnishing process.
| Coats | Waiting Time (after one layer) | Type of sanding |
| 1st coat | 1 hour | None (P400 if drips or orange peel) |
| 2nd coat | 24 hours | P1200 light sanding |
| 3rd coat | 1 hour | None |
| 4th coat | 4 hours | P1500 light sanding |
| xth coat | 4 hours | No sanding (wait for curing) |
| Final coat | 1/2 day x number of coats | No sanding (wait for curing) |
Tip: You can also incorporate wet sanding instead of dry sanding for an even smoother finish. Use high grit waterproof sandpaper (P800–P2000), a sanding block, and clean water with a few drops of dish soap — it acts as a lubricant and helps prevent scratches. Soak your sandpaper in water for 10–15 minutes before use, and lightly moisten the guitar surface as well. Ideally, keep both sandpaper and surface damp while sanding. Gently sand the surface, and frequently wipe it down to inspect your progress. This reduces airborne dust and gives a finer result, but requires a delicate touch to avoid sanding through the finish layers.
Caution: Wet sanding is not suitable for Tru-Oil finishes: water can damage the oil layer and may seep into the wood. Always use dry sanding techniques when working with oil-based finishes. Also, never wet sand bare wood — this technique is meant for sealed, colored, or clear-coated surfaces only. Ensure the surface is completely dry before applying the next coat.
Want to dive deeper into the differences and best use cases for wet vs. dry sanding? Check out our full guide here.
Once all coats have been applied, let the lacquer cure completely. If you have applied 7 coats, allow at least 7 days before final sanding and polishing. The longer you wait, the better the finish will be.
After curing, remove the masking tape from areas such as the fretboard, nut, or bindings. If the bindings have absorbed some color, gently scrape them with a razor blade to restore their original appearance.
Note: This finishing kit does not include a final polish, which is optional. Even without it, you should achieve a smooth and glossy result. However, if you desire a higher shine, you can undertake additional polishing steps, including level sanding, polishing sanding, and buffing. These steps are beyond the scope of this guide.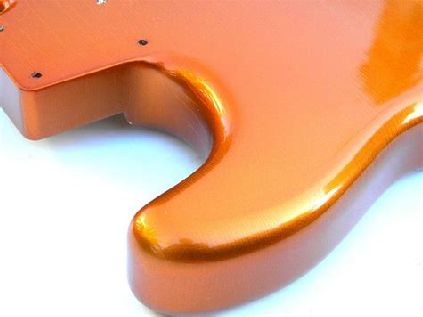
POLISHING

General Information
Polishing is optional, and normally, even without it, you should already have achieved a very nice result. However, if you want more shine and an even smoother surface, we invite you to undertake this final finishing step. Polishing can be divided into three stages: leveling sanding to remove the last defects, sanding for polishing, and finally buffing. These steps will be further detailed below. Also, take note:
- Always be careful when sanding, applying very light pressure, especially near the edges. It is easy to remove varnish if you press too hard!
- Always ensure you remove all dust generated by your work environment or sanding. One idea is to run a fan simultaneously to remove dust immediately.
- From time to time, "tap" or rub your on a mat to remove embedded dust.
- For a water-based finish, do not sand with water. Use a dry sanding method. If you sand with water on a water-based varnish that has not completely dried, you may slightly remove your varnish layer.
- When using water, always use room temperature water. Cold water can damage and crack your finish.
Before starting, the wood should have already been sanded with P800 or P1000 grit in the previous step.
Preparation
Before you begin, make sure you have both dry and wet on hand in grits P1000, P1200, P1500, P2000, and P2500. For optimal results during sanding, we recommend placing your guitar on a soft, stable surface—like a carpet or thick towel—to protect the body from scratches and ensure even pressure as you work.
Processing
Leveling Sanding:This step is only necessary if you still have localized imperfections (such as drips or significant roughness). In this case, you should sand down to P400 to remove the imperfections, then progress to P600, P800, and P1000. For localized sanding, the sandpaper is smaller, and a smaller —is used, as it is a very localized sanding process.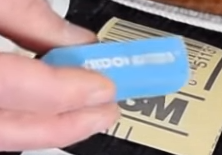
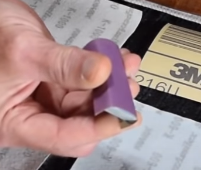
Tip: For sanding guitar edges and contours, flexible tools like a foam tip, rubber eraser, cork block, or even a thermal insulation sheath wrapped in sandpaper conform easily to curves, offering better control without flattening rounded areas. Mixing these lets you adapt quickly to different shapes while staying gentle on the wood.
Polishing Sanding:For the polishing step, refer to section IV. However, please note that this time, you should apply minimal pressure while sanding. The goal is to erode the surface, not remove material, but to eliminate slight surface imperfections created during the varnish application.
Start sanding with P1000 grit, then move to P1200, P1500, P2000, and finally P2500. Some prefer to continue, but you won’t notice a significant difference. Always remove dust using a running fan to prevent it from scratching your finish further!
At this stage, you should have a slightly whitened finish with micro-scratches removed. You can see this clearly by placing the wood near a light source and tilting it slightly to create reflections that make these scratches more visible. If you see micro-scratches, return to P1000 grit and work up to P2500.
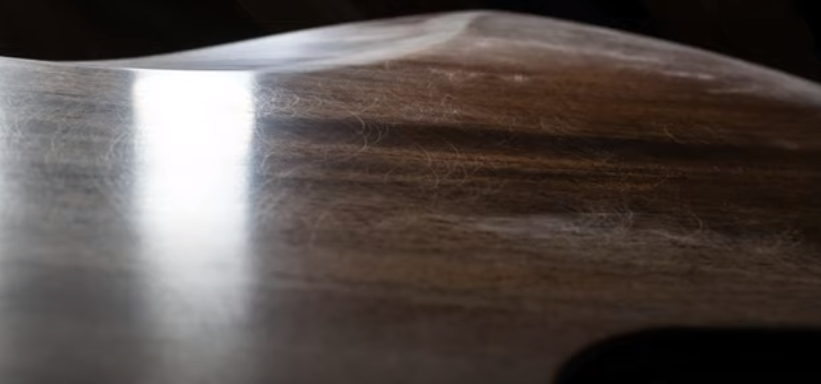
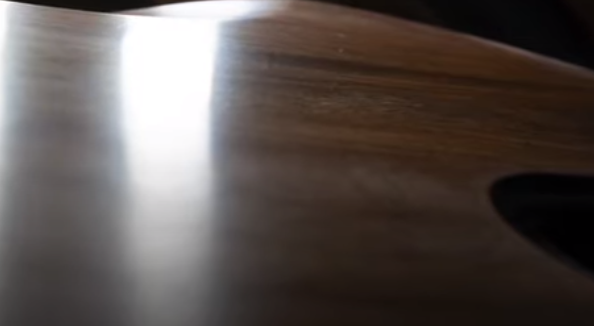
Before (left) & after (right) sanding
It is now necessary to buff your wood to transform the whitish surface into an ultra-glossy finish.
Buffing
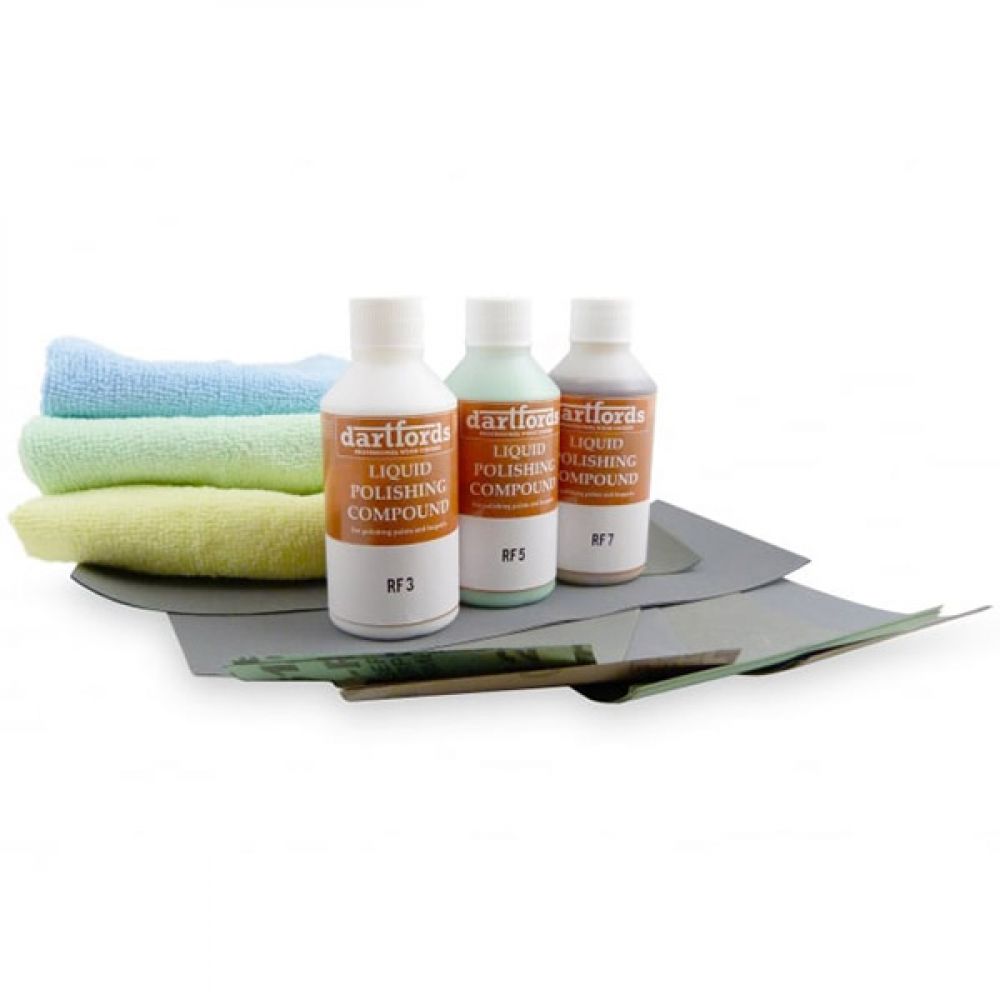
This is the final step, where additional products must be applied. You can either use dish soap mixed with water or apply dedicated polishing products, such as those available on our website. In particular, our contains everything necessary for sanding, polishing, and hand buffing (a specific guide for polishing with this finishing kit is also included). Naturally, using products specifically designed for guitar buffing will provide much better results.
The selected polishing product can be applied either by hand or by machine.
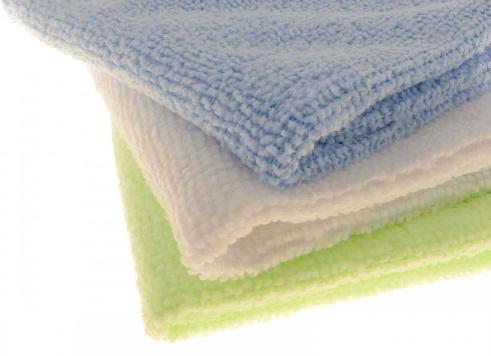
By Hand: We recommend using microfiber cloths. Rub in circular motions, applying light pressure. Rinse and continue until you are satisfied with the result.
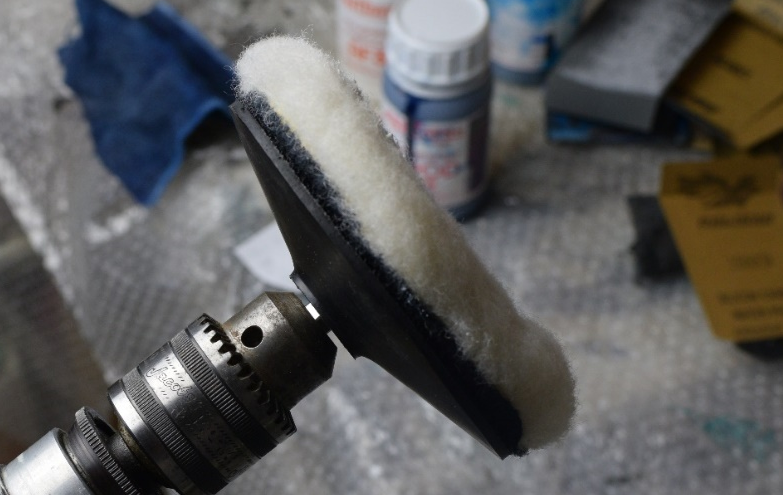
With a Machine: While dedicated polishing machines exist, you can easily use a drill with a polishing attachment to buff your guitar effectively. Always keep the drill moving at a moderate speed to avoid overheating the surface, as excess friction can damage the finish. Start with a firm for initial polishing, then switch to a softer to enhance the shine and achieve a smooth, glossy finish. Be aware that some areas may be too tight or curved for the machine to reach.
Note:
During this final buffing process, wearing a respirator and protective goggles is also advised, especially when using a polishing machine. Polishing product particles will be sprayed into the air.
Thank you for following our tutorial! Feel free to check our products : &
Related Products
From $57.08 was $63.42
To $217.83 was $265.25

From $28.19 was $55.31
To $197.07 was $229.84

From $37.76 was $51.26
To $207.99 was $239.05
From $75.30 was $83.66
To $230.61 was $279.44
Related Posts
- The Guitar Fabrik
- Jun 27, 2025
- 296views
IBANEZ CUSTOM BASS SHOWCASE
- The Guitar Fabrik
- May 29, 2025
- 427views
B.C. RICH CUSTOM GUITAR SHOWCASE

- The Guitar Fabrik
- May 1, 2025
- 176views
MUSIC MAN CUSTOM BASS SHOWCASE
- The Guitar Fabrik
- Apr 28, 2025
- 733views
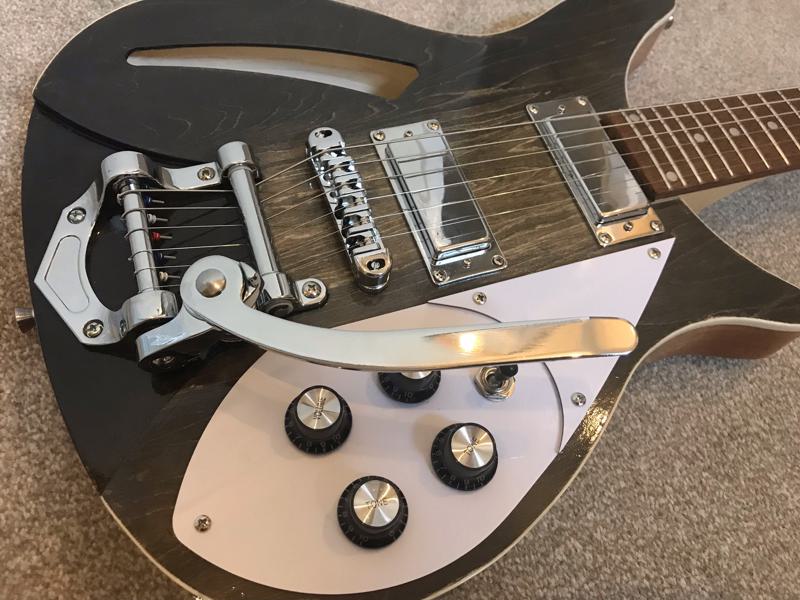
RICKENBACKER CUSTOM GUITAR SHOWCASE
Related Products
From $57.08 was $63.42
To $217.83 was $265.25
From $28.19 was $55.31
To $197.07 was $229.84
From $37.76 was $51.26
To $207.99 was $239.05
From $75.30 was $83.66
To $230.61 was $279.44
Recent Posts