
Les Paul Wiring Diagram
- 2 humbuckers
- 3-way switch
- 2 volumes, 500K
- 2 tones, 500K
Modern wiring diagram
Swipe sideways to see the whole diagram.
- Hot (signal)
- Ground
- Tone capacitor, typically 0.022–0.047 µF
Pots are shown from the back, with the lugs on top and numbered 1 to 3. All four pots are 500K, B for the volumes and A for the tones. With the switch in the middle, turning one volume to zero silences the whole guitar. That is normal for this circuit. Wires in your guitar may not match the red and black used here, so follow what each wire does. The order of the lugs varies between switch makers, so check yours with a multimeter before soldering.
Left-handed guitar? The circuit is the same: only the positions of the parts change.
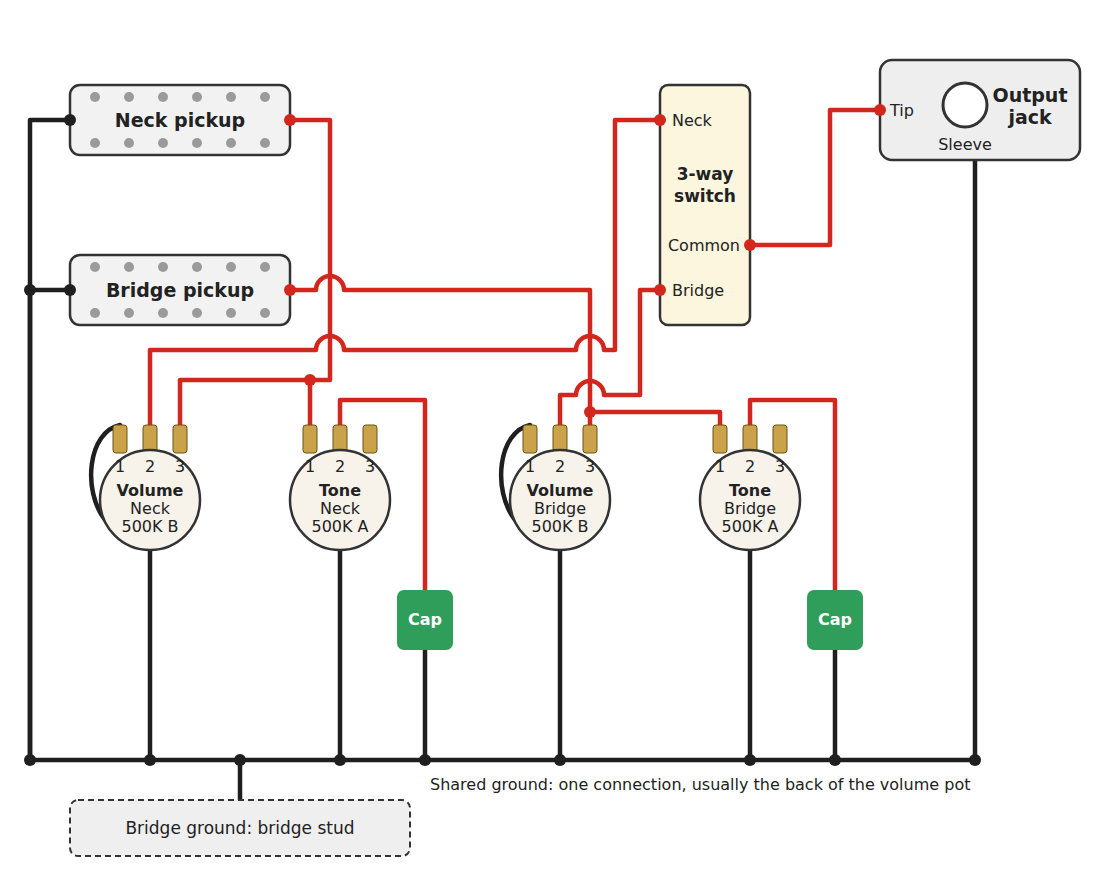
What each switch position does
| Position | Pickups on | Tone control connected |
|---|---|---|
| 1: Bridge | Bridge | Bridge tone |
| 2: Bridge + neck | Bridge and neck | Neck tone and Bridge tone |
| 3: Neck | Neck | Neck tone |
50s wiring diagram
Swipe sideways to see the whole diagram.
- Hot (signal)
- Ground
- Tone capacitor, typically 0.022–0.047 µF
Pots are shown from the back, with the lugs on top and numbered 1 to 3. All four pots are 500K, B for the volumes and A for the tones. Only the tone section changes: each capacitor goes from the volume’s output (lug 2) to the middle lug of its tone pot, and lug 1 of the tone pot goes to its back. This keeps more treble as you turn the volume down, but the volume and tone controls affect each other more. Wires in your guitar may not match the red and black used here, so follow what each wire does. The order of the lugs varies between switch makers, so check yours with a multimeter before soldering.
Left-handed guitar? The circuit is the same: only the positions of the parts change.
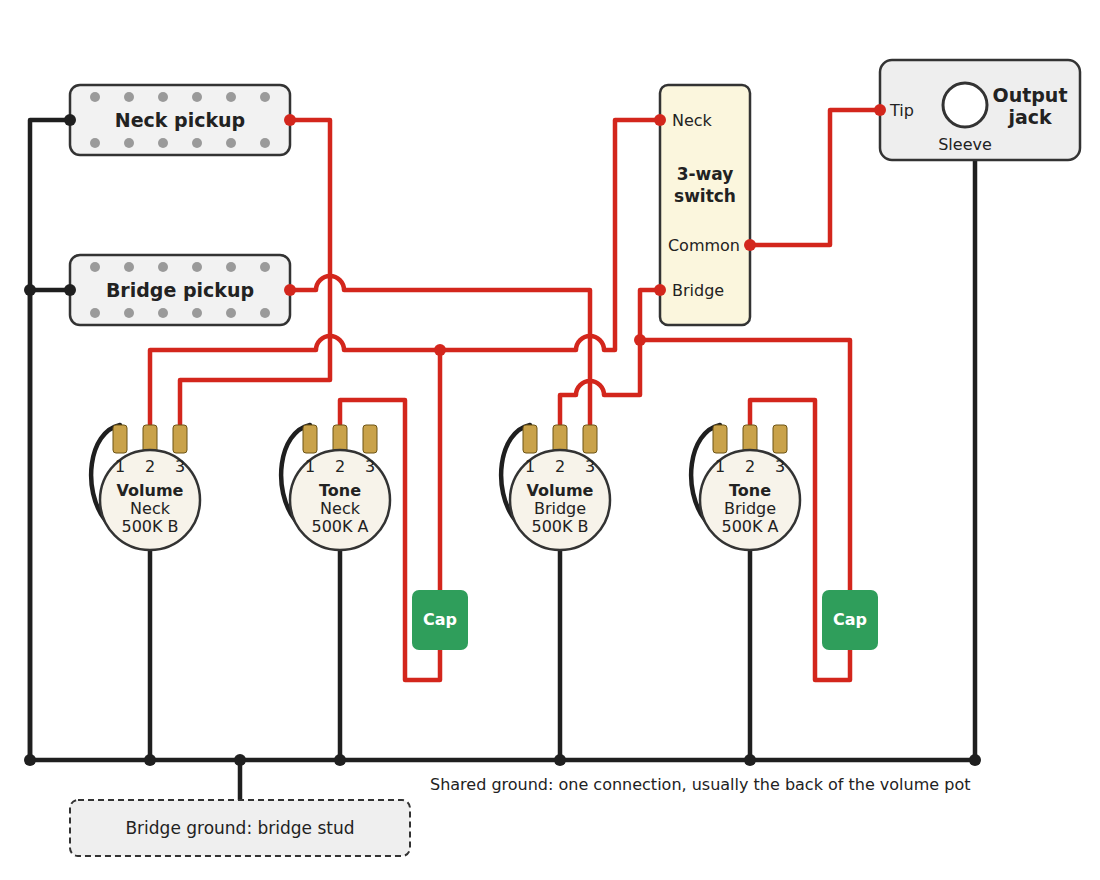
What each switch position does
| Position | Pickups on | Tone control connected |
|---|---|---|
| 1: Bridge | Bridge | Bridge tone |
| 2: Bridge + neck | Bridge and neck | Neck tone and Bridge tone |
| 3: Neck | Neck | Neck tone |
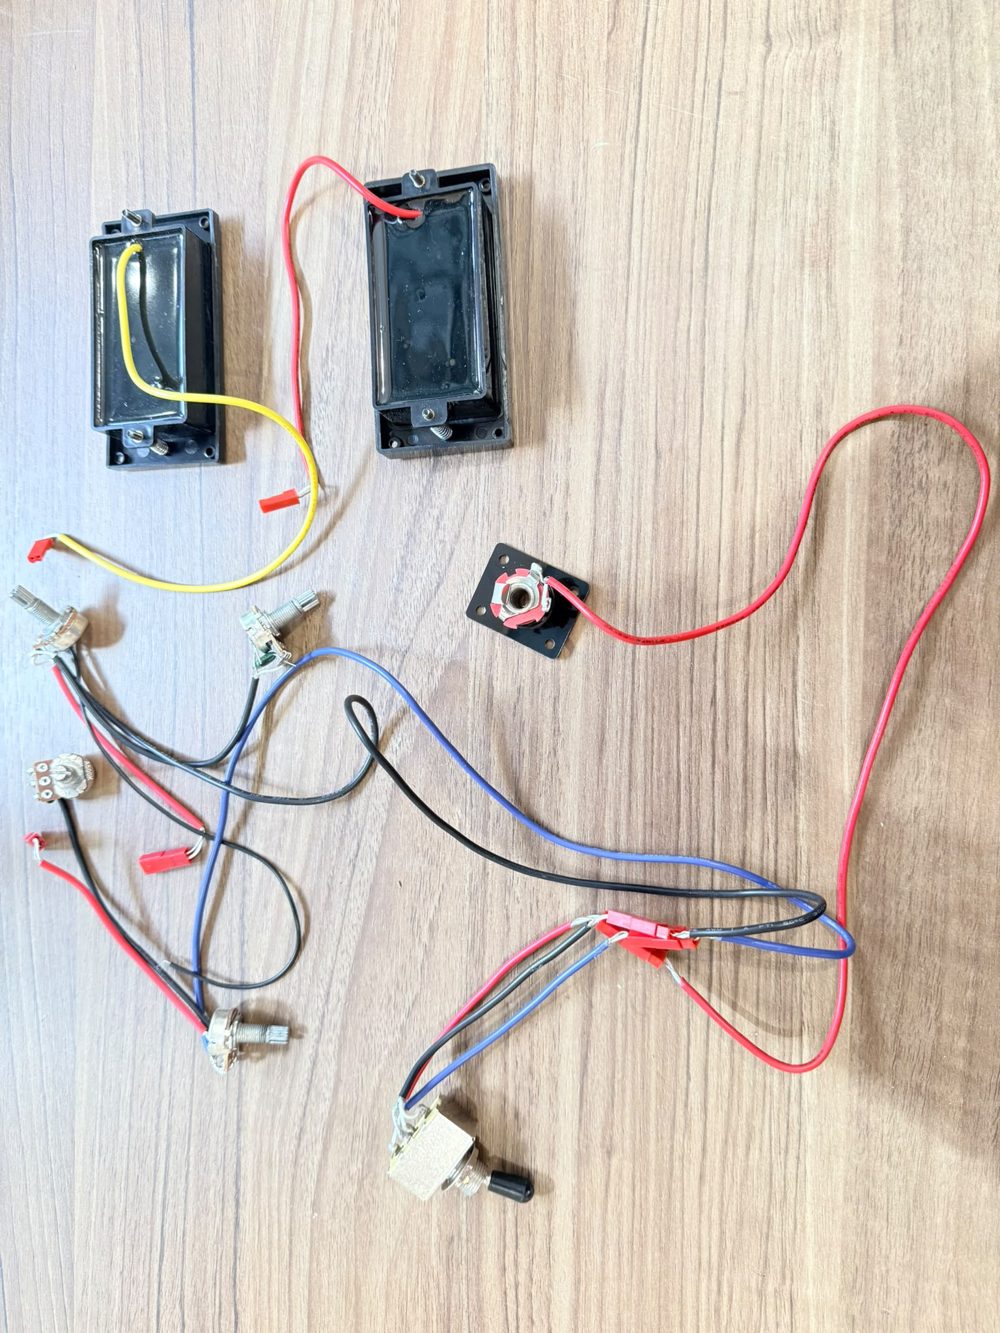
How a two-humbucker kit plugs together
- Connect the pickups. Push each pickup plug into the plug on the lead from its volume pot.
- Connect the switch. Push the two leads from the volume pots into the two matching leads from the switch.
- Connect the jack. Push the jack lead into the third lead from the switch.
- Attach the ground wire. Fix the remaining ground wire under a bridge screw or stud. No soldering needed.
- Test before closing. Plug into an amp and gently tap each pickup with a screwdriver in each switch position.


Les Paul is a trademark of its owner. The Guitar Fabrik is not affiliated with or endorsed by the trademark owner. The name is used only to describe the wiring layout.
