UK
UK US
US FR
FR DE
DE ES
ESGUITAR PAINT GUIDE – NITRO SPRAY CERUSE
- The Guitar Fabrik
- GUIDA VERNICIATURA CHITARRA
- 15 mag 2025 views
- 286
A textured look that fills wood grain with lighter pigments, offering a sophisticated, aged effect. Discover the recommended kit and products for this finish: &
Please take a moment to carefully review these instructions. They provide a clear overview of the process and help you avoid common mistakes. For a deeper understanding, be sure to explore the other building and painting guides available in our blog section, which offer valuable tips and techniques to enhance your project.
PREPARAZIONE
COSE IMPORTANTI DA SAPERE PRIMA DI INIZIARE
• In caso di dubbio, rileggi le istruzioni per l'uso o le istruzioni del produttore. Puoi anche cercare ulteriori informazioni su Internet (ma attenzione, ci sono alcune informazioni fuorvianti). Se non sei ancora sicuro, contattaci!
• Stai sempre molto attento al tuo corpo e al tuo manico. È davvero facile creare un'ammaccatura, un graffio, una goccia di vernice. Non avere fretta.
• Assicurati che il tuo ambiente sia sempre pulito. Un problema comune è applicare una macchia/vernice in un ambiente polveroso che porta a una finitura imperfetta.
• Non verniciare la tastiera a meno che tu non sappia che è ciò che preferisci. Normalmente, non applichiamo nulla o solo un po' d'olio come olio di limone o olio minerale per Palissandro o Ebano per mantenere il gioco confortevole.
PRODOTTI UTILI NON FORNITI
In questa sezione sono elencati solo gli strumenti strettamente necessari. Ma è sempre possibile migliorare ulteriormente il tuo prodotto finale con regolazioni aggiuntive e utilizzando altri strumenti. Ciò richiede esperienza in liuteria e non sarà discusso qui.
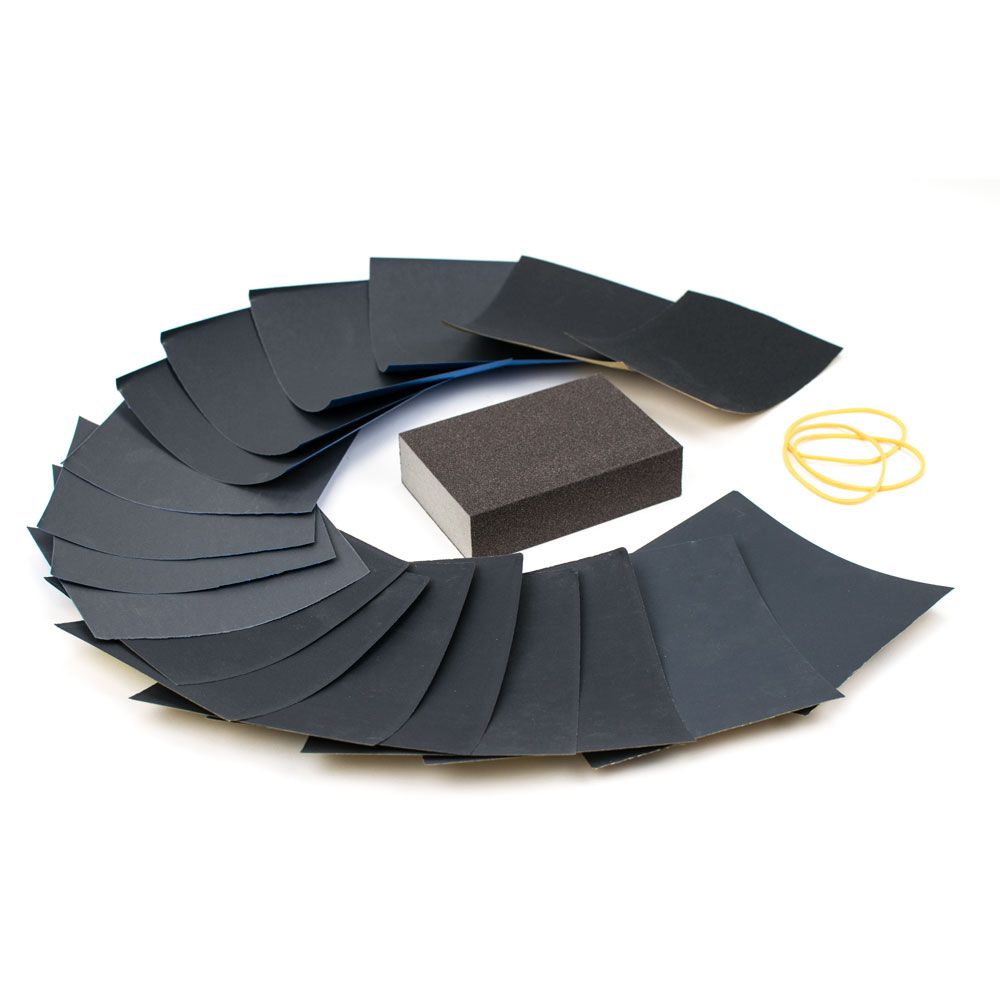
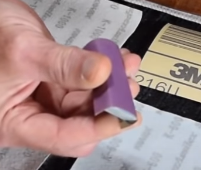
P240 P400, P600, P800, P1000 e P1200 per levigatura e lucidatura parziale. La carta abrasiva verrà utilizzata durante le varie fasi della finitura, in particolare per la levigatura iniziale e la lucidatura finale. | |
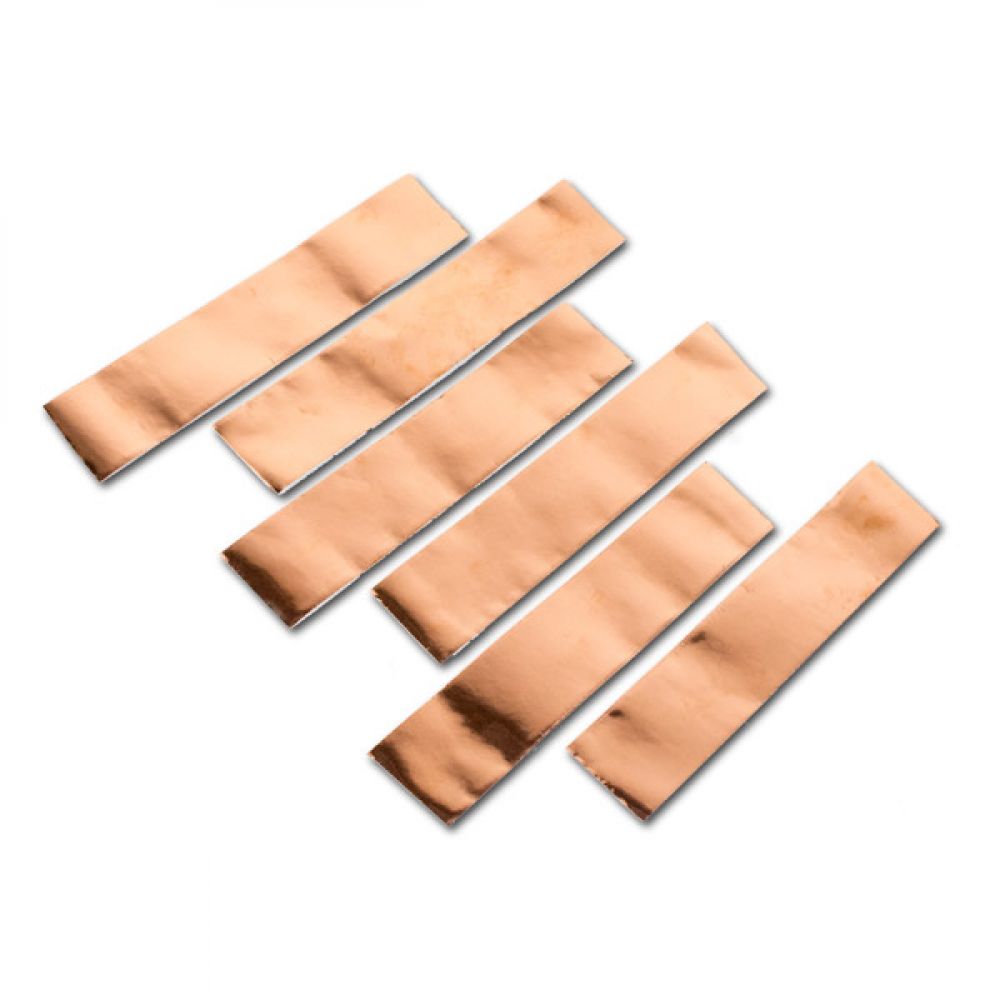
Nastro adesivo in rame per prevenire interferenze elettromagnetiche dai tuoi microfoni e ottenere una qualità del suono migliore. Non è obbligatorio ma consigliato. | |
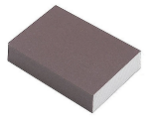
Questo è un blocco di levigatura a grana 240. Verrà utilizzato durante le varie fasi della finitura, in particolare per la levigatura iniziale e la lucidatura finale. In particolare, vi verranno fissate diverse carte abrasive secondo le esigenze. | |
Coppia di guanti in gomma utilizzati per proteggere te stesso e il legno durante la finitura. Verranno utilizzati durante le diverse fasi della tua finitura. | |
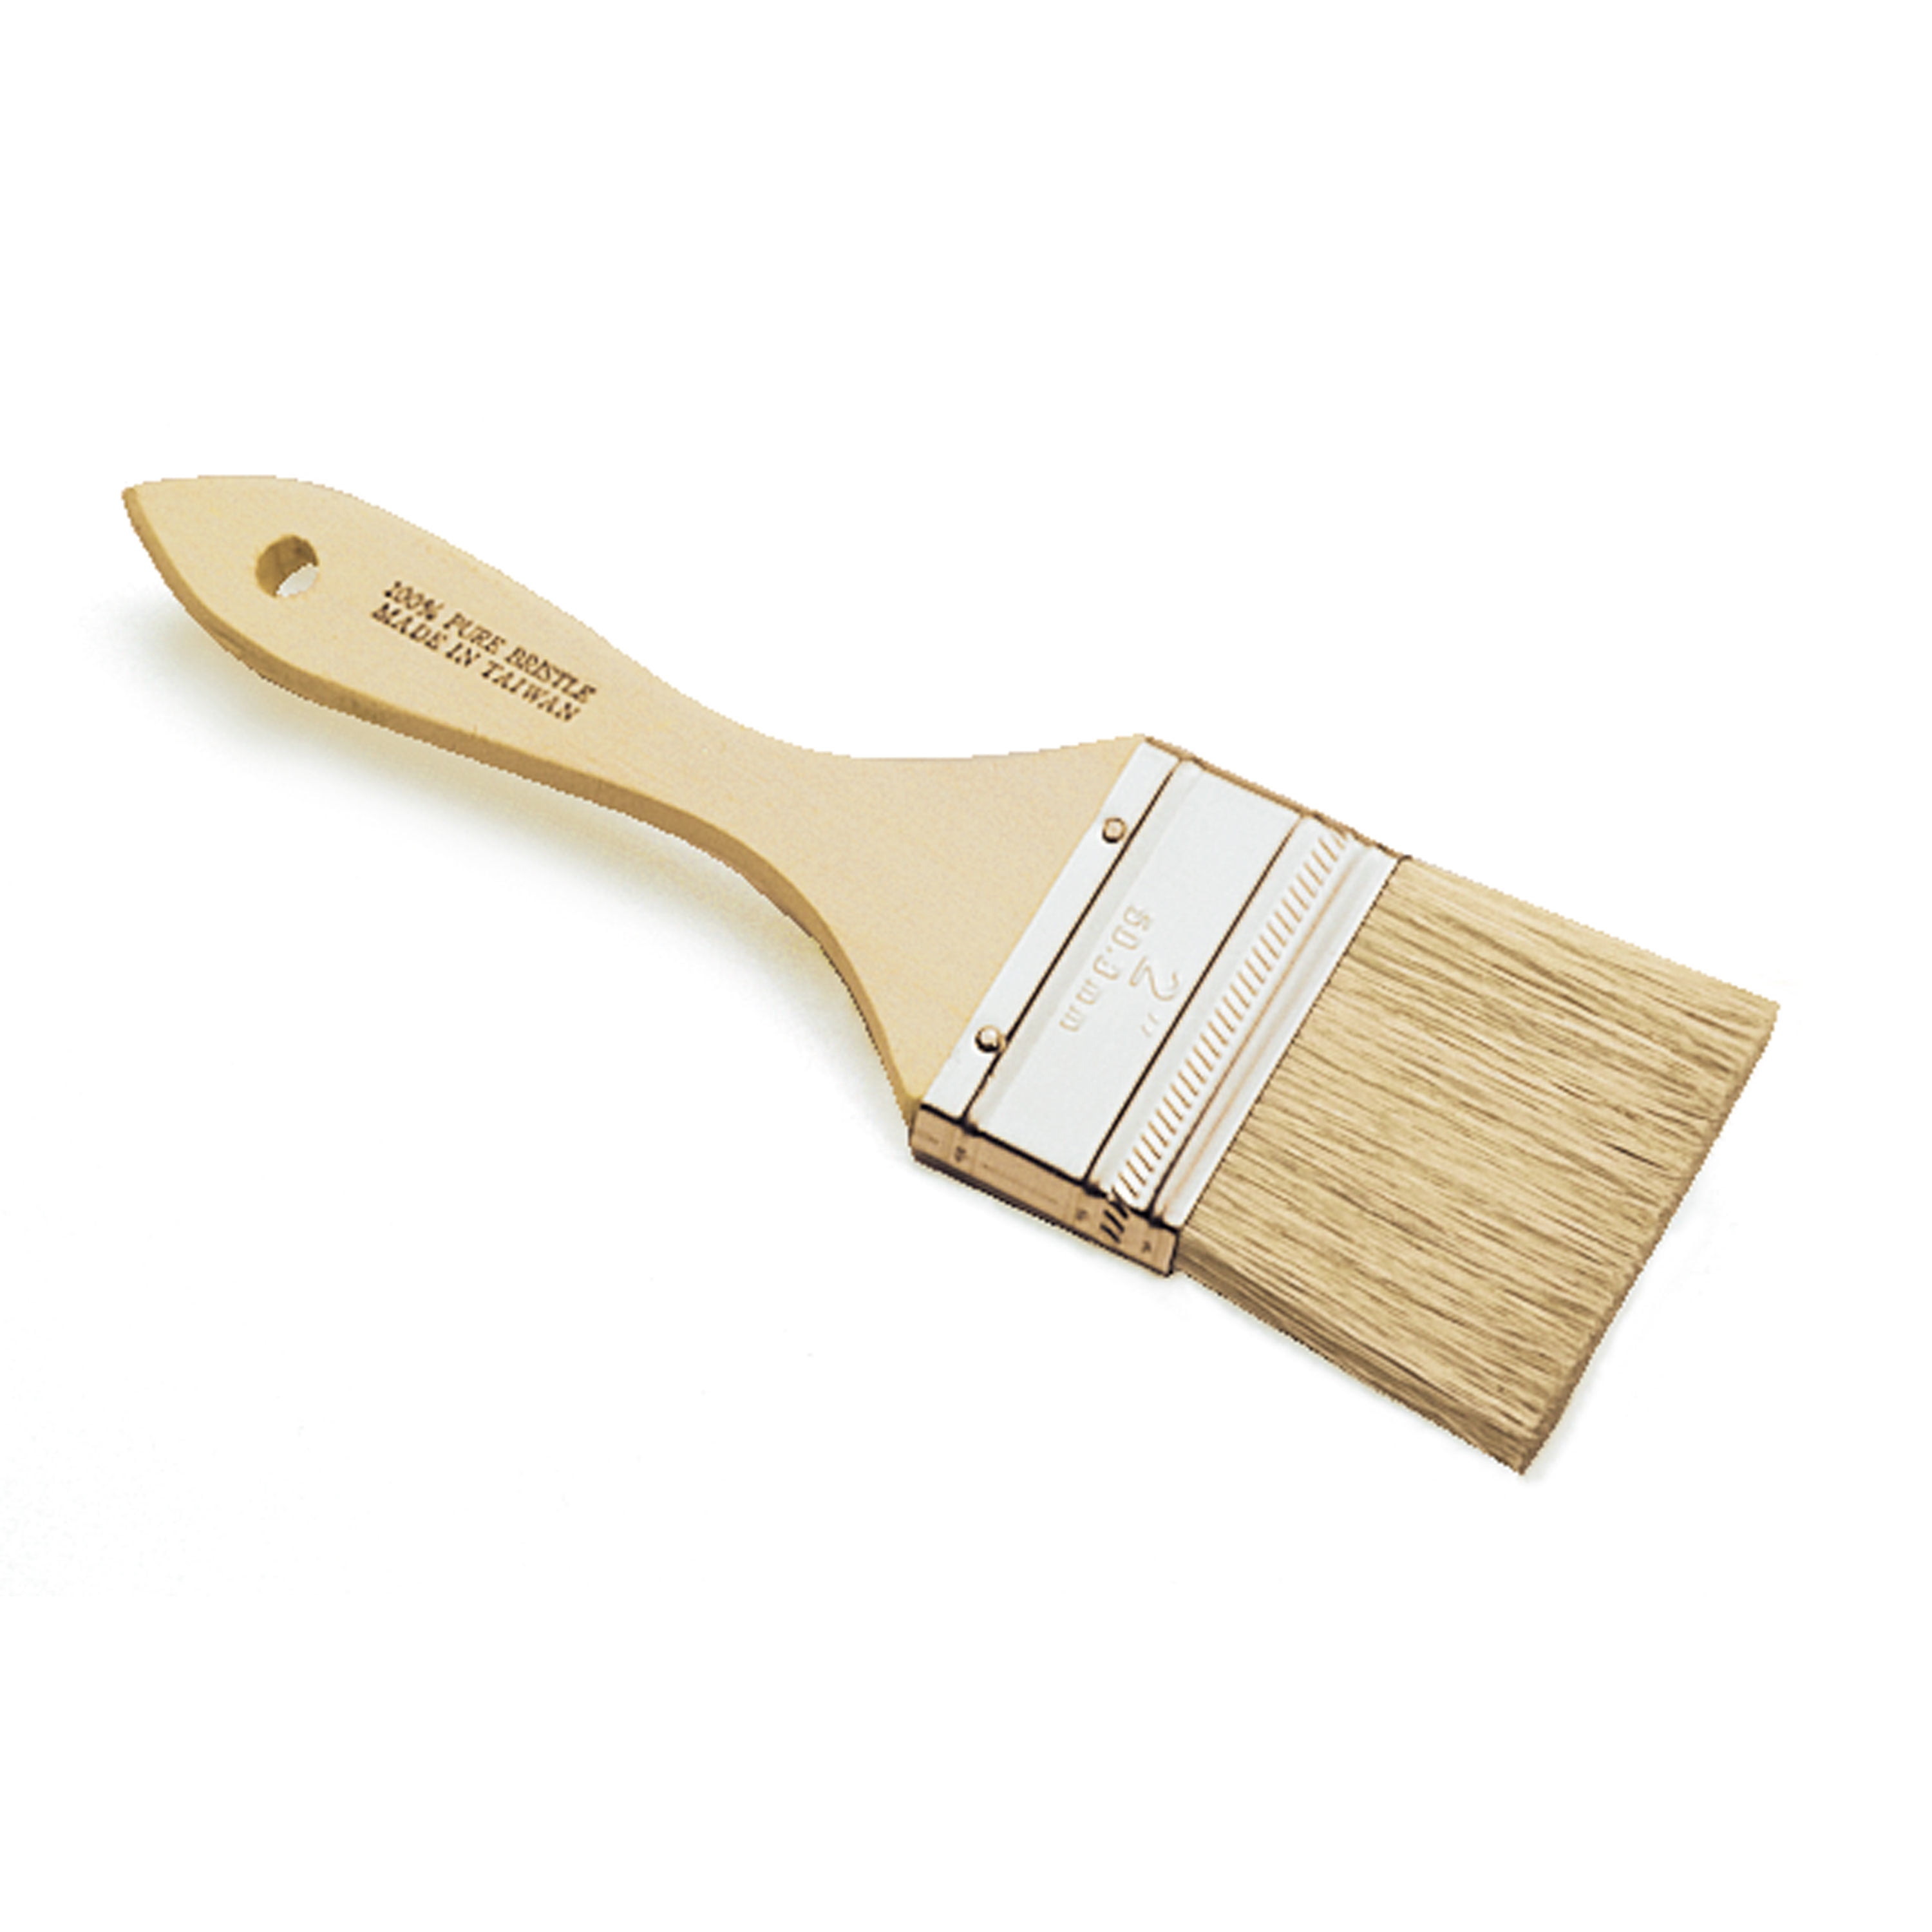
Il pennello sufficientemente grande ti permetterà di applicare facilmente il tuo smalto a base d'acqua. | |
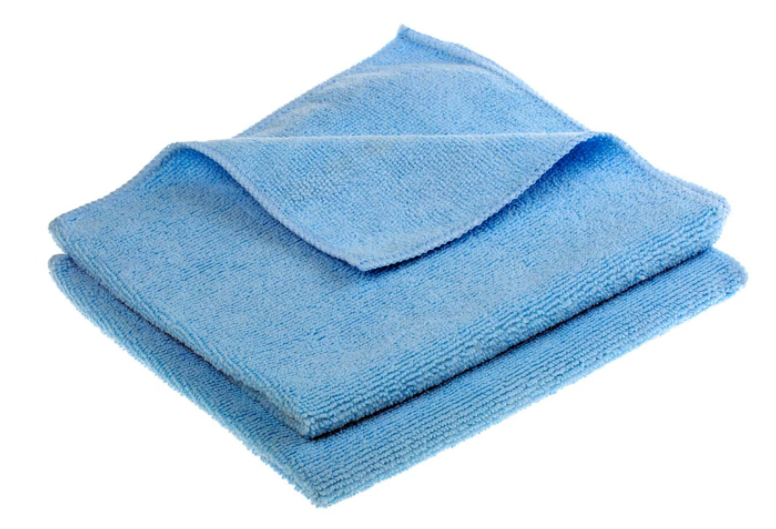
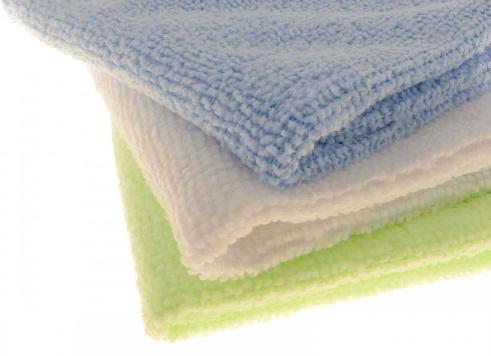
Può essere utilizzato per applicare la vernice, se non si dispone di uno spray o per applicare la macchia. Preferisci un panno in microfibra. | |
Il nastro da mascheratura è necessario per mascherare aree specifiche che non si desidera verniciare, come la tastiera o i binding. | |
Può essere utilizzata per applicare il riempitivo per i pori. | |
Questo è opzionale. Ma ricorda che avrai bisogno di spolverare durante la fase di levigatura. | |
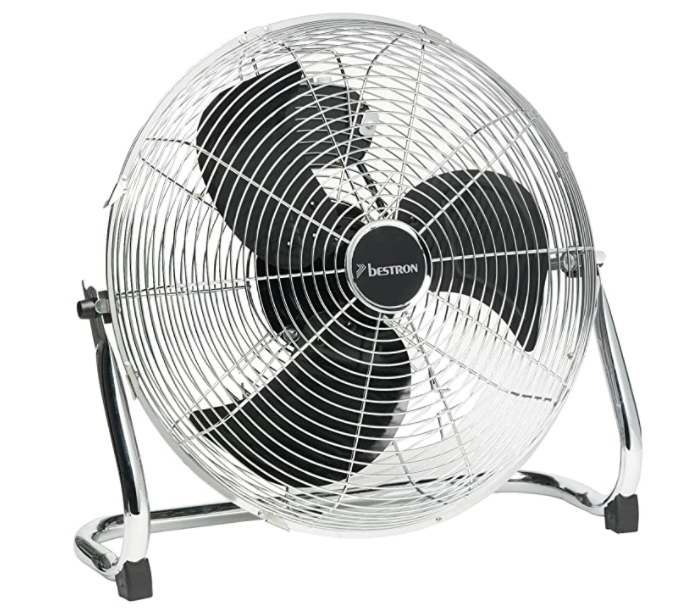
Un ventilatore è fortemente consigliato durante il passaggio finale di lucidatura quando si utilizza un metodo di levigatura a secco. |

PRODOTTI CONTENUTI NEL TUO KIT DI FINITURA
Fondamentalmente, avrai bisogno di macchia, pittura a olio, pittura spray, riempitivo per pori, vernice, ecc. A seconda della tecnica che intendi utilizzare e del kit della gamma The Guitar Fabrik che scegli!
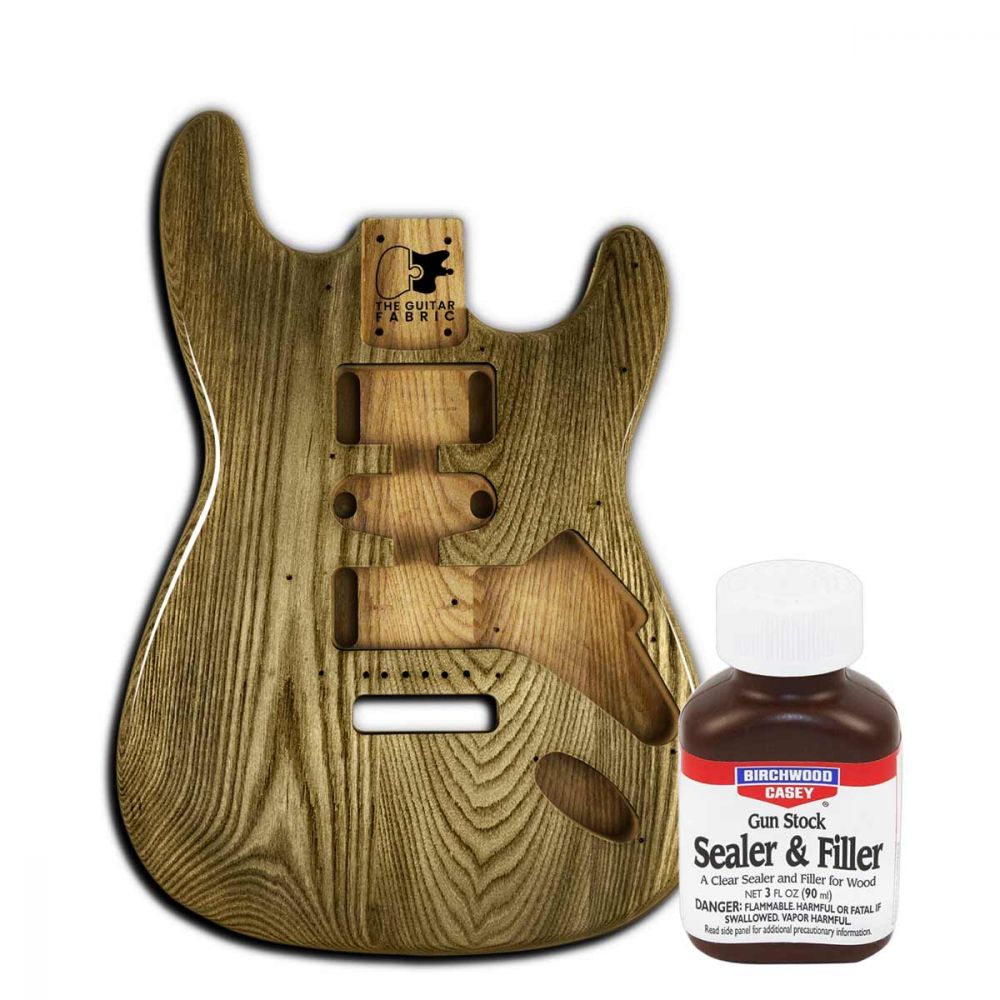
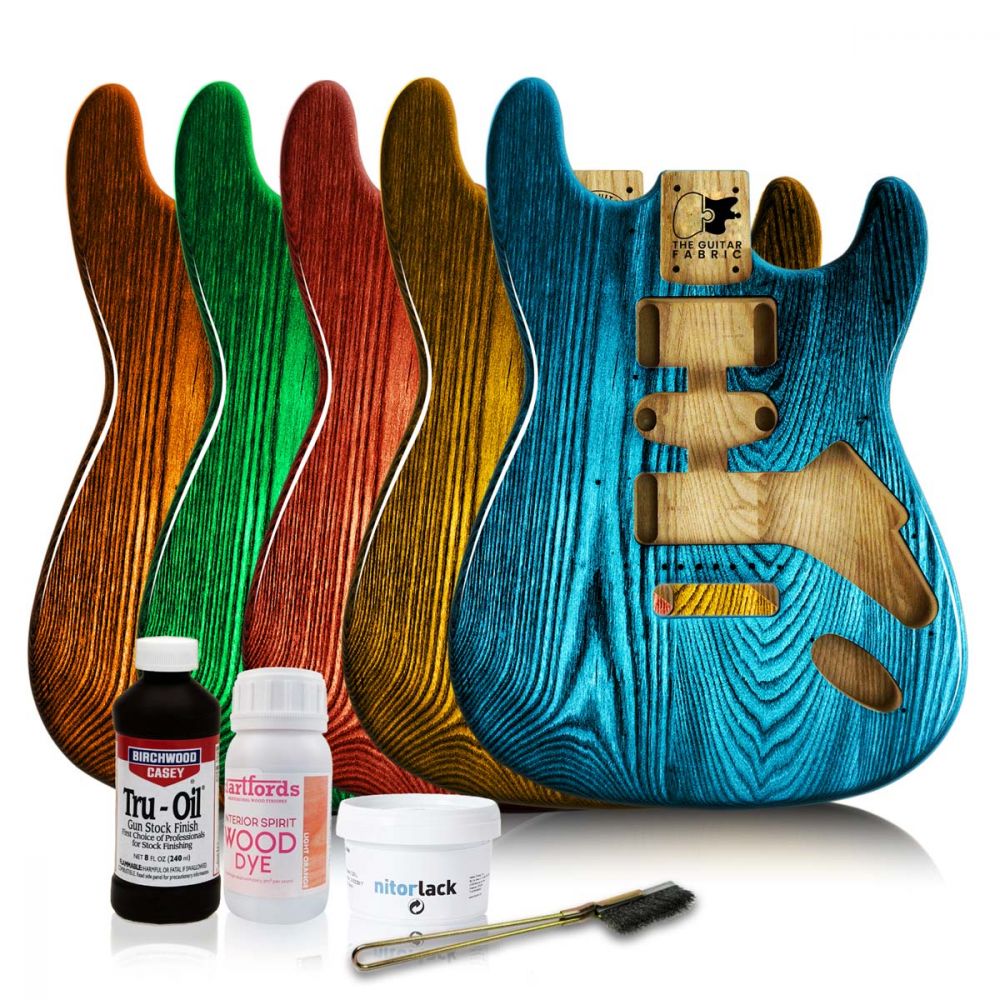
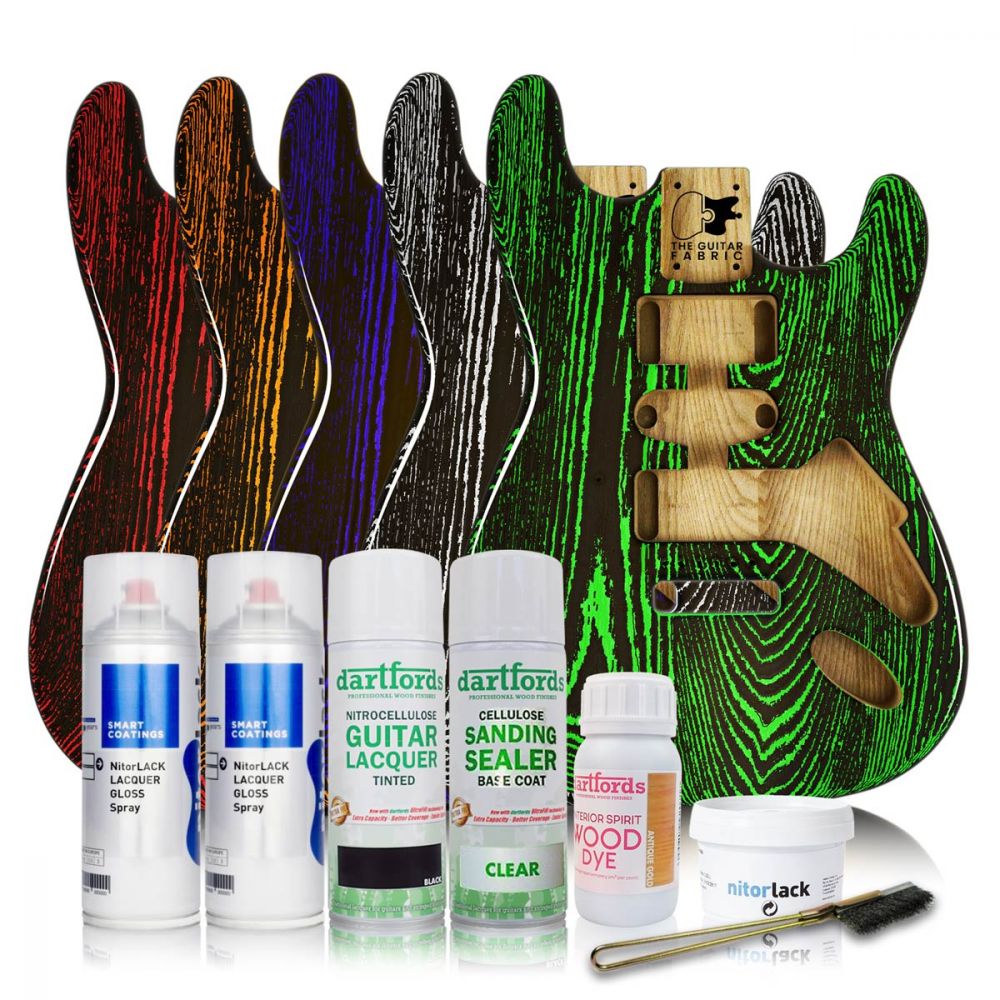
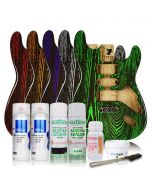
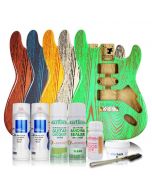
With the ceruse paint kit, here is the list of tools and consumables you will receive:
The grain filler will be used to colorize the grain of your wood by blending it with one of the stains you ordered. It also helps to close the open pores of the wood. | |
The clear primer will be used between the wood stain and the vein stain. Its application makes the liming technique easier to control. | |
The dye will be used to dye the body and / or the neck to color your guitar as desired and enhance the beauty of your guitar wood. | |
This selected stain will be mixed with the wood filler to exclusively colorize the wood grain using a ceruse technique. | |
The varnish will be used to highlight your finishes and protect your guitar and finishes over the years. |


OVERVIEW OF THE FINISHING STEPS
Here are the steps to follow to achieve the expected finish using your kit:
- Working environment
- Wood & Grain preparation
- Application of a first selected stain to dye the body of the wood
- Application of the transparent primer to seal the initial coloration of your wood
- Mixing your second selected stain with the wood filler to color the grain.
- Application of the wood filler-stain mixture to fill the pores of the grain
- Application of the primer to seal the entirety of your work
- Varnishing
- Polishing (optional)
The different methods and practices defined in this guide have been extensively tested. Strictly following the instructions in these instructions for use will lead to the expected results. Although it is possible to do some things differently. This method has been implemented to make it as easy as possible for the user to undertake the finishing of his guitar and to obtain a professional result as desired and at a lower cost.
AMBIENTE DI LAVORO
• Prima di iniziare a finire il tuo corpo e manico, è importante:
• Avere un'idea chiara del tipo di finitura che vuoi per il tuo corpo e manico. Questa deve ovviamente corrispondere al prodotto che hai già selezionato quando hai acquistato il tuo kit di finitura. Ad esempio, se hai un kit chitarra Stratocaster e hai scelto un kit di finitura a base d'acqua con venatura sublime nel poro a bocca e una tinta, puoi:
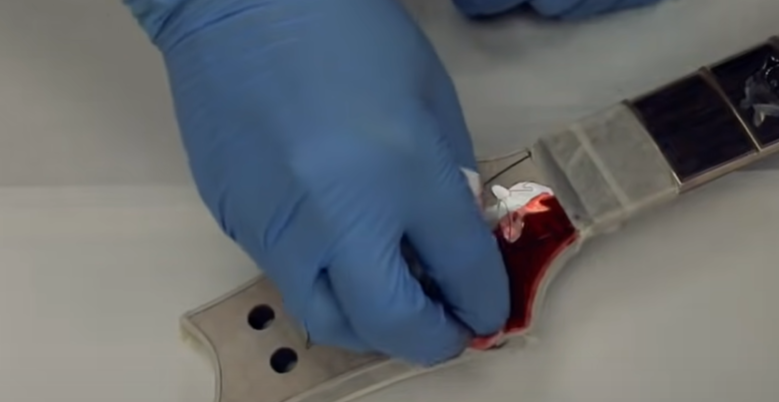
• Per il corpo, esaltare la venatura con il riempitivo nero solo sul fronte del corpo e tingere l'intero corpo. Farò una tonalità molto scura per il fronte e il retro e più tenue per i lati.
• Per il manico applico il sigillante solo sulla parte superiore della testa del manico e tingo solo la parte superiore della testa del manico.
• Corpo e manico sono verniciati (tranne per la tastiera)
• Controlla di avere tutti i prodotti e gli strumenti necessari per finire il tuo kit. Questi sono definiti nella tabella precedente.
• Riserva uno spazio di lavoro per tutta la durata della tua finitura. Il tuo spazio di lavoro non dovrebbe essere polveroso. È meglio non dipingere all'aperto poiché gli insetti possono essere attratti dagli odori dei prodotti di finitura e finire per attaccarsi alla tua finitura. Dovresti sempre preoccuparti di rimuovere la polvere di legno durante le fasi di finitura per un risultato finale pulito. La finitura del tuo kit può richiedere da 1 settimana a 1 mese a seconda del livello di finitura selezionato e del tuo impegno quotidiano. Questo è dovuto principalmente al fatto che i diversi strati di tinta, vernice, ecc. devono essere lasciati asciugare. Quindi idealmente avere uno spazio dove puoi lasciare il tuo lavoro durante l'intera fase di finitura.
• Consigliamo anche di lasciar riposare il legno per 2 giorni a temperatura e umidità ambiente affinché la densità del legno non si modifichi (se è stato sottoposto a un forte gradiente di temperatura). In generale, lavora altrove in un ambiente con temperatura e umidità ambienti stabili.
• Per realizzare facilmente la finitura, dovrai posare o appendere il tuo corpo e manico. Puoi anche scegliere di assemblare il corpo e il manico prima o dopo la finitura. Consigliamo di assemblare il corpo e il manico solo se desideri ottenere una finitura omogenea tra il corpo e il manico. Ad esempio, una tinta rossa per il retro del corpo e il retro del manico. Così puoi vedere più chiaramente una differenza di colore tra di loro. Per l'uso di spray aerosol, dipingere o verniciare il corpo e il manico.
• quando è molto importante ottenere un risultato omogeneo su tutti i lati ti invitiamo a posizionare il tuo legno come segue:
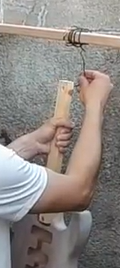
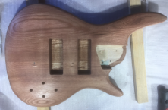
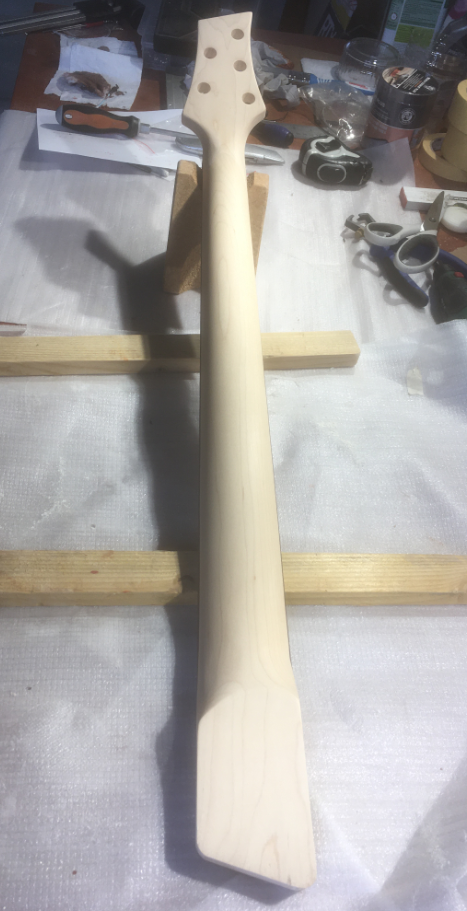
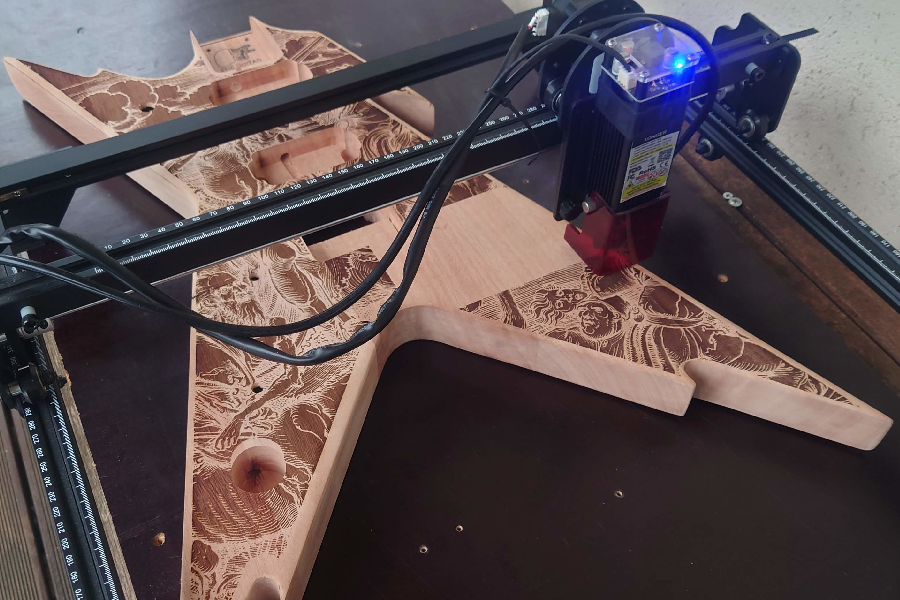
- Puoi appendere il corpo e il manico al soffitto usando un filo e attaccarlo per il manico tramite un foro per alloggio meccanico (come nella foto sotto), e per il corpo utilizzare una vite a livello della tasca del manico nel caso di un manico avvitato, o un foro per bottone della tracolla: 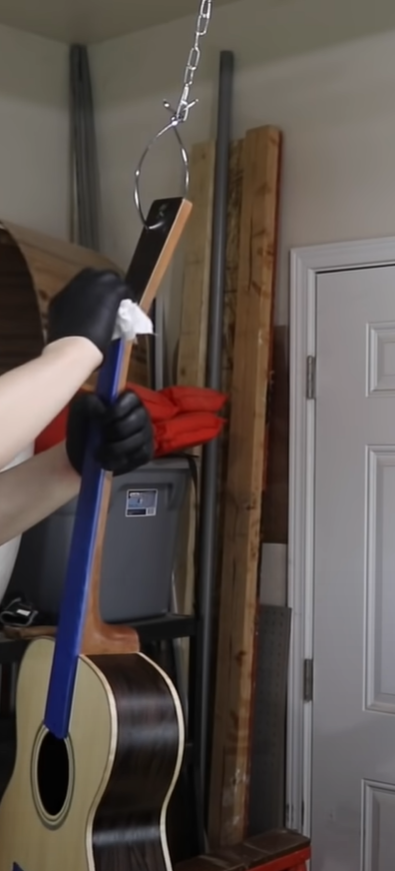
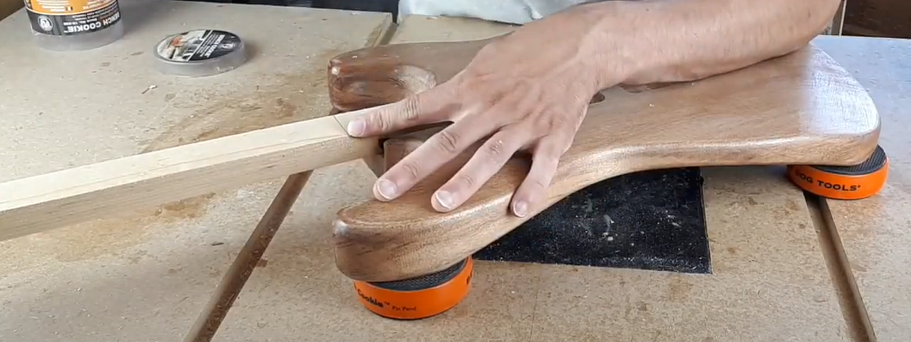
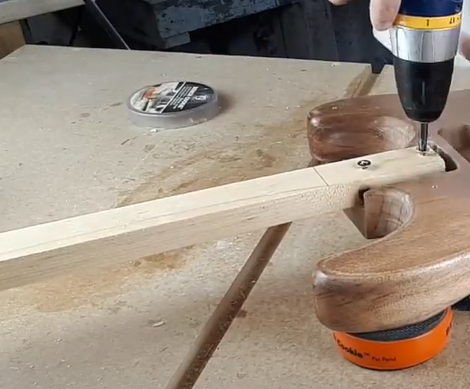
- Puoi anche fissare il corpo a un pezzo di legno. Questo ti permette di tenerlo in mano durante la finitura con uno spray o di metterlo in una morsa:
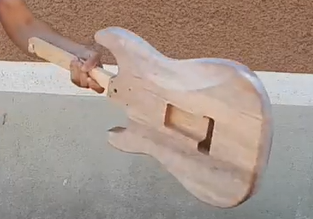
• Per tutto ciò che riguarda la levigatura, lucidatura e tintura, dove è necessario lavorare più direttamente con il legno, è consigliabile posizionare il corpo con il manico piatto per lavorarci sopra, in questo caso è preferibile un materiale leggermente flessibile per posarlo. Puoi sollevarlo leggermente con cuscini. Maneggia sempre il corpo e il manico delicatamente.

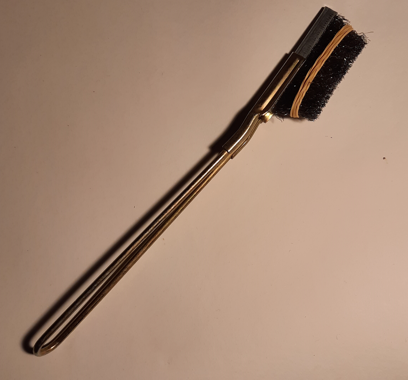
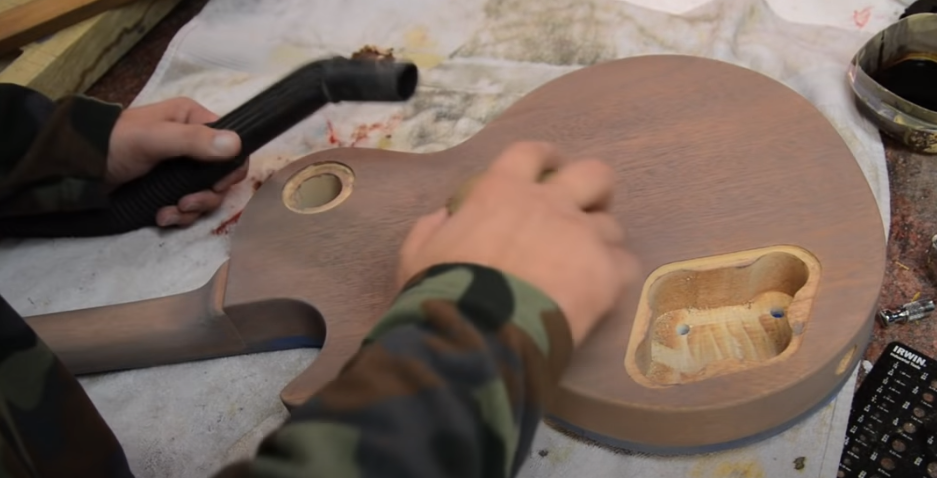
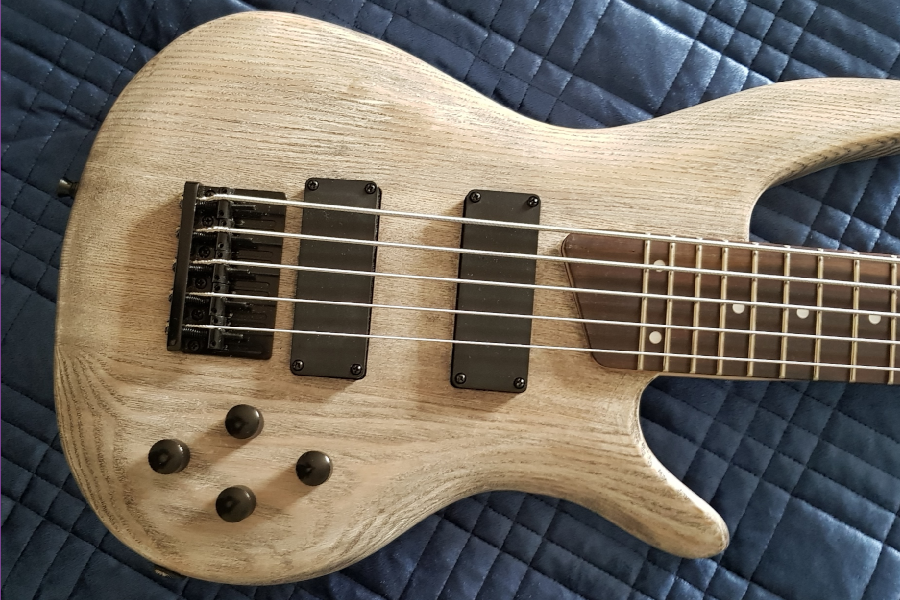
CERUSE EFFECT: USE OF THE METALLIC BRUSH
Before sanding we invite you to use the wire brush to increase the grain depth. To do this, simply brush the wood in the direction of the grain to open the pores. Do not hesitate to rub strongly: the more the pores of the wood will be open the more the contrast between the 2 colors selected will be intense. 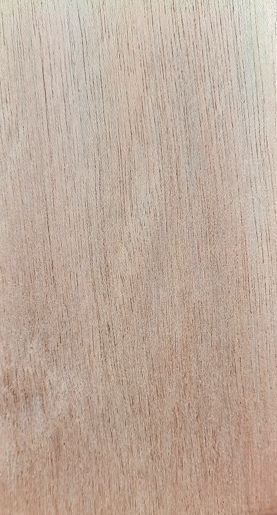
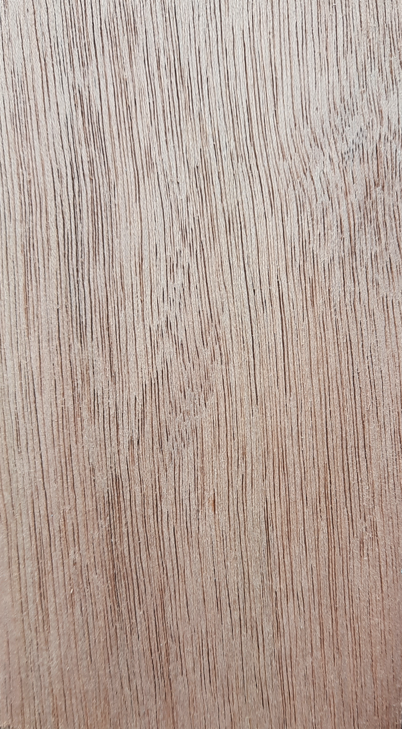
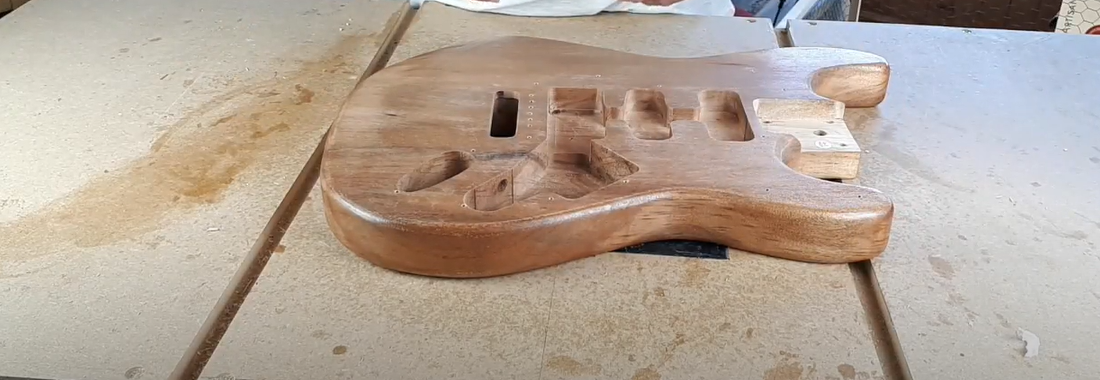
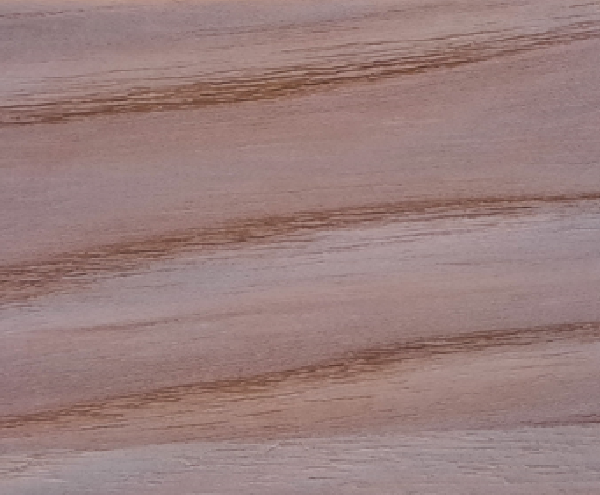
Mahogany wood before (left image) and after (right image) the use of the metallic brush. The pores of the wood are now more open.
Ash wood after using the metallic brush.
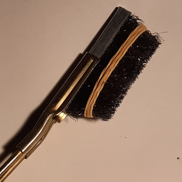
As shown in the pictures below, you can also add a rubber band to your wire brush to further localize the pore opening of the ash wood.
PREPARAZIONE DEL LEGNO
MACCHIE DI COLLA
Vi invitiamo a dare un'occhiata approfondita al vostro corpo. Se vedete macchie di colla, rimuovetele levigandole leggermente a mano con carta vetrata con una grana di P240 / P400, gradualmente. Verificate ad ogni passaggio fino a quando non saranno più visibili, l'obiettivo è rimuovere il meno materiale possibile.
ALZARE LE FIBRE (opzionale)
Questo è solo per il legno di mogano e frassino e se state usando un prodotto che contiene acqua. Comunque, è anche opzionale, ma davvero per assicurarsi di ottenere una finitura perfetta e liscia. Se non eseguite questo passaggio, i risultati finali saranno comunque ottimi. Questo è particolarmente utile per una finitura con vernice nitrocellulosa o poliuretanica opaca perché ciò permetterà di utilizzare meno vernice.
Ogni volta che l'acqua o una macchia o una finitura contenente acqua entra in contatto con il legno, provoca il rigonfiamento delle fibre del legno, che viene chiamato "sollevamento delle fibre" o “rigonfiamento delle fibre”. Dopo che l'acqua si è asciugata, il legno è ruvido al tatto. Poiché non potete prevenire l'alzamento delle fibre se usate un prodotto a base d'acqua, dovete prendervene cura affinché la finitura finale sia liscia.
Quindi, prima di levigare, dovete inumidire il legno con acqua a temperatura ambiente con una spugna o un panno. Poi lasciate asciugare il legno durante la notte o almeno 4-5 ore se l'aria è calda e secca. Poi inizierete a levigare con P240. L'obiettivo è levigare le fibre sollevate senza levigare più in profondità del necessario, nel qual caso le fibre appena esposte potrebbero sollevarsi quando bagnate. La carta vetrata opaca funziona meglio perché non taglia facilmente in profondità.
Guardate il vostro legno e se pensate sia ancora necessario, iniziate di nuovo: inumidite il legno e levigate di nuovo. Potete usare una carta vetrata più fine questa volta (P400).
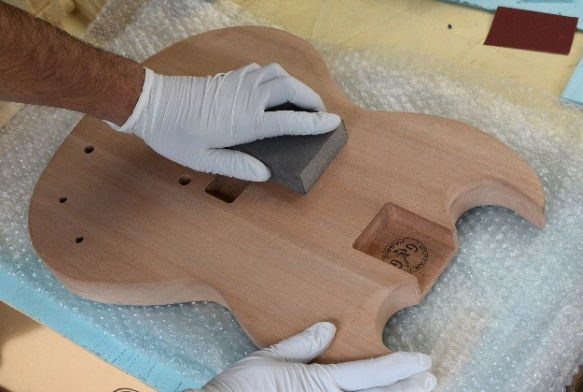
LEVIGARE IL CORPO E IL MANICO
Lo scopo della levigatura è creare una superficie ideale per la finitura e per fare ciò dobbiamo creare una superficie liscia, eliminare le imperfezioni e i segni delle macchine che influenzano la vostra finitura. Si noti che il vostro corpo e manico sono stati pre-levigati con grana P180.
Prima di tutto, ecco alcune regole importanti da seguire durante la fase di levigatura:
- Levigate sempre nella direzione delle fibre (avanti e indietro con le fibre) mai di lato. Per i lati e il bordo del corpo può essere più difficile levigare nella direzione delle fibre, in tal caso levigate sempre in una direzione che avete predefinito.
- Levigate prima con una grana P240, poi P400 nel caso di una macchia. Questo passaggio di lisciatura del legno con diversi livelli di grana è importante. Ogni passaggio P240 e P400 ha i suoi usi.
- Cavità che non necessitano di essere verniciate poiché saranno coperte da uno dei componenti, come i pickup del battipenna, ecc., non necessitano di essere levigate.
- Levigate bene tutte le superfici piatte e i contorni, e non dimenticate i punti difficili da raggiungere. Poi pulite con un panno o con un ventilatore per rimuovere tutta la polvere e i trucioli di legno.
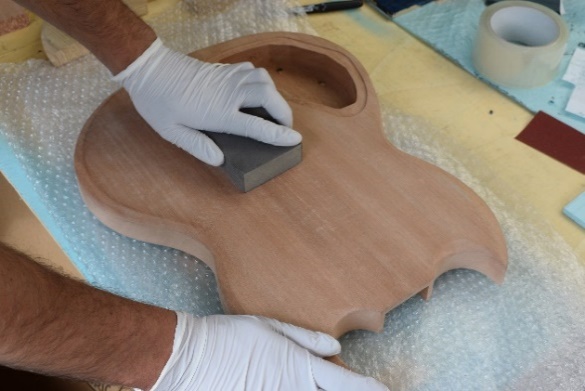
- Dovreste SEMPRE usare un blocco di levigatura sulle superfici piane della vostra chitarra (o una levigatrice rotante se l'avete).
- Quando usate il tampone di levigatura o la carta vetrata, pulitelo spesso. Per fare ciò battete e sfregate leggermente su una superficie di panno per rimuovere la polvere incuneata nella vostra carta vetrata. Quando la carta vetrata diventa molto consumata, sostituitela.
- Quando levigate i bordi della vostra chitarra o aree delicate del collo, rimuovete il blocco di levigatura e fate semplicemente scorrere la carta vetrata tra le dita contro la superficie. Ci vuole più tempo, ma porterà a una finitura migliore e vi permetterà di avere più controllo.
- Quando siete soddisfatti del vostro lavoro, assicuratevi di rimuovere tutta la polvere e i grani di levigatura con un aspirapolvere o un panno umido.
Levigatura per superfici piane - a mano
Questo è un passaggio un po' noioso ma essenziale ed è importante farlo bene per ottenere un buon risultato.
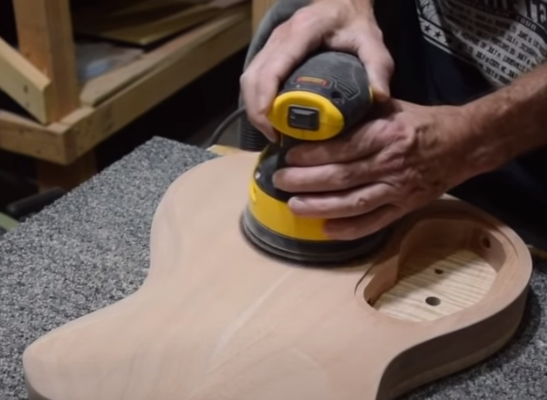
Levigatura delle superfici piane - con levigatrice rotante
Se avete una levigatrice rotante (solo rotante), altri tipi di levigatrici non vi daranno risultati consistenti, e sapete come usarle, non esitate - vi faciliteranno la vita. Ma prendetevela con calma!
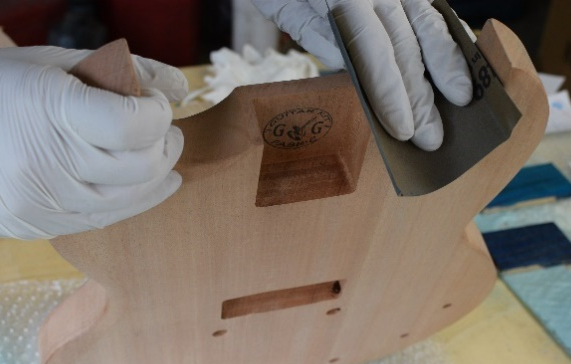
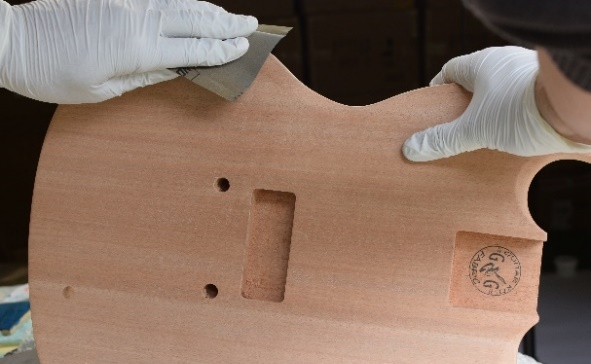
Levigatura dei contorni - a mano
Ovviamente, una levigatrice rotante non è più un'opzione.
TINTARE IL LEGNO
INFORMAZIONI GENERALI
- Applicare la tinta è il passo più semplice tra i diversi passaggi di finitura ed è anche il più piacevole, poiché renderà il tuo kit di chitarra bellissimo.
- La principale difficoltà con la tintura è anticipare i risultati finali. Infatti, a seconda del legno, della concentrazione di tinta e della vernice, il risultato finale sarà diverso. Come regola generale, puoi utilizzare le regole del colore (giallo con blu farà verde, ecc.). Quindi, ad alto livello, un mogano che ha una tinta rossa, se applica una tinta blu, creerà una colorazione viola. La tua miglior opzione sarà utilizzare un campione di legno venduto sul nostro sito per testare la finitura a monte e ottenere la finitura che stai realmente cercando.
- Suggeriamo di procedere passo dopo passo. Prima tingi con una diluizione forte come il 40% di spirito bianco (ancora, non mescolare con acqua se stai usando una vernice a base d'acqua). Dai risultati ottenuti, puoi quindi aumentare il colore aggiungendo più prodotto colorante. Puoi persino usare la tintura pura, così come più strati per aumentare ulteriormente l'intensità.
- Non applicare troppa tintura in una volta. Non è bene che il legno sia troppo bagnato. Stai particolarmente attento con un'impiallacciatura.
- A meno che tu non voglia riadattare il tuo colore e la concentrazione di tinta, non è necessario carteggiare tra le mani di tintura.
- Per controllare l'intensità della tinta, puoi applicare strati extra di tinta per aumentare l'intensità o carteggiare leggermente per ridurre l'intensità (ma cerca di evitare la carteggiatura).
Applica una tinta a base d'acqua con una vernice a base d'acqua: Si prega di notare che le tinte a base d'acqua non sono compatibili con la nostra vernice a base d'acqua. Infatti, reagiranno insieme e si mescoleranno. Usa una tinta a base di alcool come le nostre tinte vendute sul nostro sito web o incluse nel tuo kit di finitura.
METODO PER AUMENTARE L'INTENSITÀ DELLA TUA TINTA
Carteggia fino a P600: Ti invitiamo a carteggiare con grana P600 dopo una prima tinta se stai cercando un colorante intenso. Infatti, la tinta sarà in grado di penetrare meglio il legno se il legno è stato precedentemente carteggiato meno finemente. Puoi quindi applicare una seconda tinta. Altrimenti puoi carteggiare con grana P600 e quindi applicare la tua prima tinta.
Solleva i pori del legno prima della tintura: Sebbene opzionale e solo per mogano o frassino, sollevare la grana dei legni che desideri tingere è utile se desideri aumentare l'intensità della tinta. Questo perché i legni accetteranno più tintura se solleva la grana prima della tintura. Per fare ciò, bagna un panno pulito con acqua e strofina il legno con esso. Sebbene non debba allagare la superficie, non aver paura di bagnarla nemmeno. L'acqua penetrerà nel legno e farà sì che la grana si sollevi e si apra. Lascia asciugare completamente il legno, tutta la notte, o aspetta 6-8 ore se il tuo ambiente di lavoro è a temperatura e umidità ambiente. La grana dovrebbe ora raccogliersi e la tua superficie è ora pronta per accettare più tinture. Fai questo processo solo una volta. Non utilizzare questo processo su impiallacciature.
Mescola con stucco per legno: se usi uno stucco per legno come spiegato nella sezione dello stucco. Questo aumenterà significativamente l'intensità della tinta.
PREPARAZIONE
In un contenitore metti un po' della tua tintura quindi aggiungi qualche goccia di spirito bianco. Come detto, pensiamo che il 60% di tinta / 40% di spirito bianco sia una buona diluizione per una prima mano, ma ricorda che dipende veramente dall'intensità di colorazione che stai cercando!
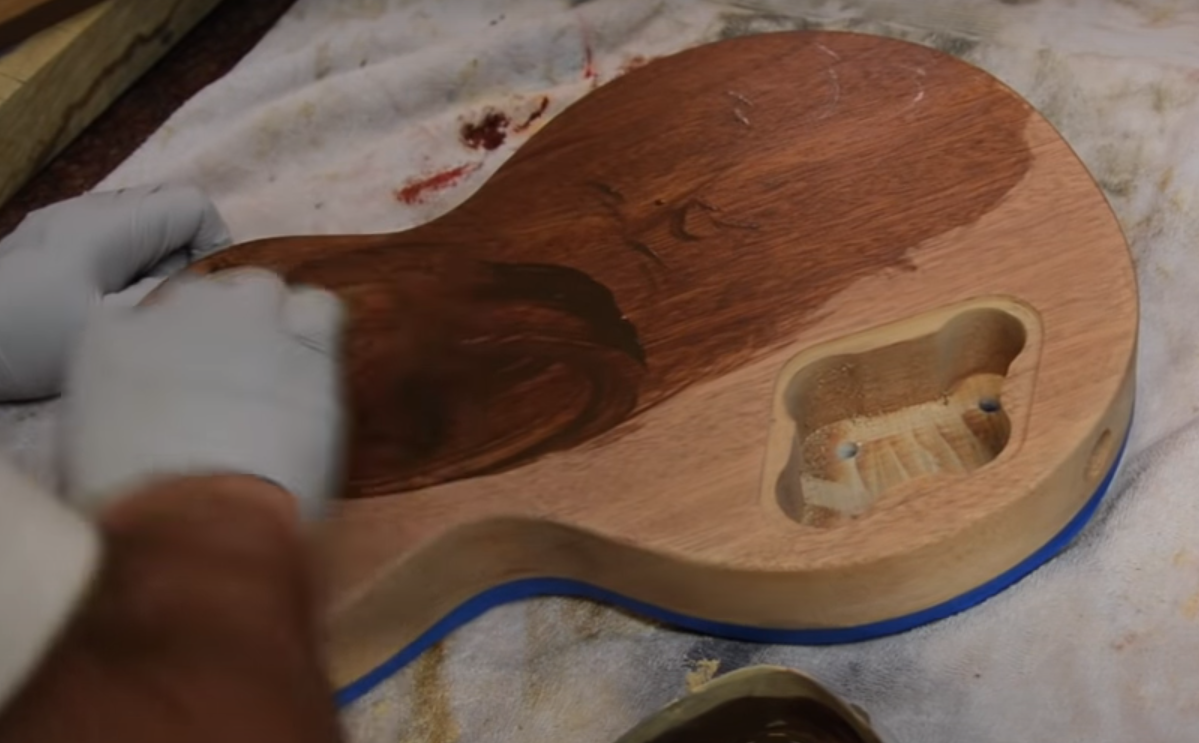
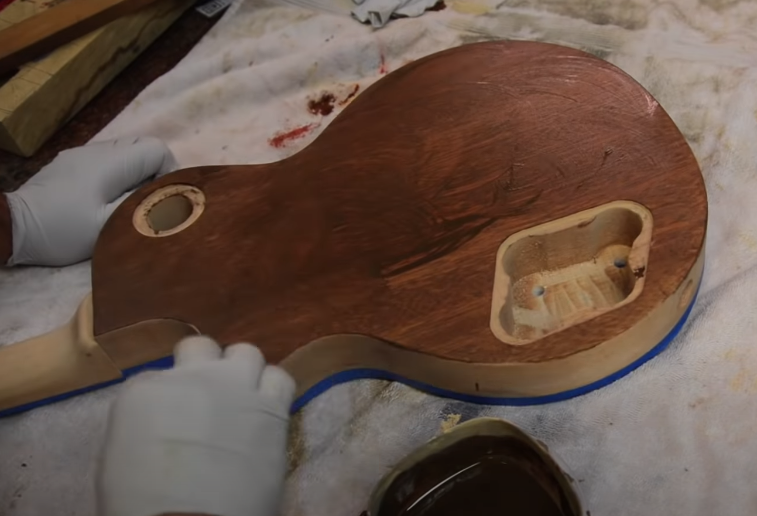
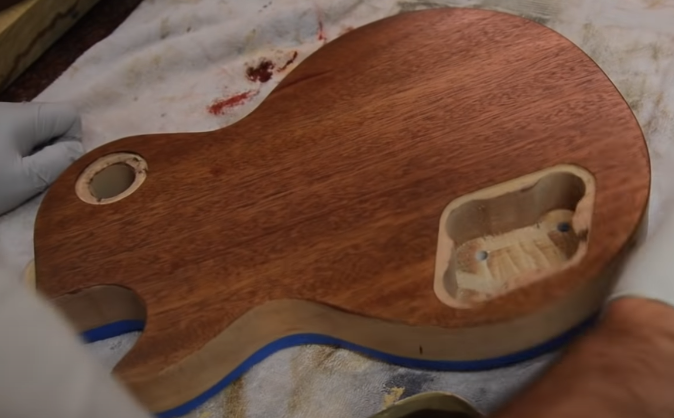
APPLICAZIONE
Per applicare la tintura, immergi un panno nella tua soluzione di tintura e applicalo sul legno con un movimento circolare. Non inumidire troppo il tuo legno. Quindi lasciare asciugare per 1 ora. Controlla i tuoi risultati e, in base alla tua soddisfazione, aggiusta con una mano aggiuntiva di tintura con una concentrazione adeguatamente regolata.
Una volta soddisfatto, attendi 2 giorni prima di procedere con il resto della tua finitura.
NITRO SPRAY CLEAR PRIMER
GENERAL INFORMATION
This step is the most delicate in the application of our liming technique. It serves in particular to:
- Seal your previous work,
- Protect the body stain when applying the wood filler-stain mixture defined in the following section,
- Control the amount of colored grain surface.
The diagram below illustrates the different stages and layers related to the coloring and filling of the wood. Note especially the protective layer provided by the primer and the fact that by applying more or less primer, you can potentially completely block the wood pores. 
Here is some additional information to keep in mind:
- Before applying the primer, make sure your wood has been sanded with P600 grit. And make sure to remove any dust with fan or using a hair dryer.
- It is crucial to apply as thin layers as possible to achieve a smooth finish.
- We recommend between 2 and 4 thin layers of primer for an optimal result while ensuring the security of your liming effect.
- Inspect your wood thoroughly after each layer to ensure everything is proceeding well.
PREPARATION
Before opening, we recommend shaking your nitrospray clear primer. Then, open it and you can mix it a bit more – using a wooden stick, for example – to ensure that your paint is homogeneous. Place the guitar wood you want to finish as described in section III.
APPLICATION
Apply the primer layers as thinly as possible. Use a wide brush or a clean cloth (preferably microfiber). Apply the primer in one direction, following the grain if possible. Do the top, the sides, and then the back. Do not sand between layers unless there are drips or orange peel. If there are drips or orange peel, sand that area with P600 without applying strong pressure. Also, make sure to wait for the primer to completely dry before applying each new layer (2 hours is recommended for the first two layers, then wait overnight). Only sand for your final layer with no pressure, using P800 only to remove imperfections.
MIXING AND APPLYING GRAIN FILLER + DYE
GENERAL INFORMATION
With the previously applied stain and primer, the goal now is to color only the grain. To achieve this, the idea is to fill the grain - the pores of the wood - with a wood filler that you have previously colored.
MIX YOUR WOOD FILLER WITH YOUR STAIN
Prepare your mixture to color the grain as desired. Mix the wood filler with the stain. To control the intensity, you can dilute it with white spirit. Also, the final texture of your paste should be somewhat like custard. It should be easy enough to apply and scrape. It is important to be able to scrape your colored paste well to remove any residue on the wood: only the pores of the wood should be filled and colored! To apply the wood filler, we recommend wearing gloves, although it is not harmful. We suggest mixing our wood filler with a little bit of water, let's say 10% warm water. This will allow for easier application and prevent the formation of lumps that would need to be sanded diligently.
PREPARATION
To apply the pore filler we invite you to wear gloves although this is not harmful. We suggest that you mix our mouth pore with a little water. Let's say 10-20% lukewarm water. This will allow for easier application and avoid creating patties that would have to be sanded down painstakingly.
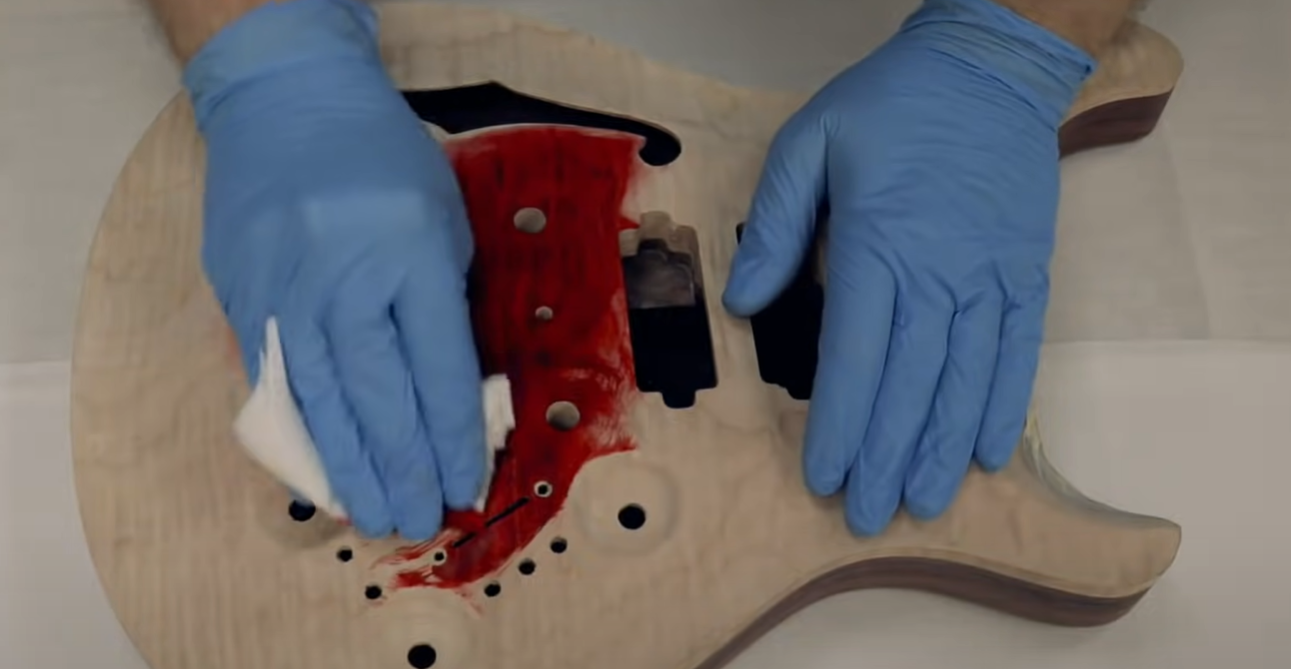
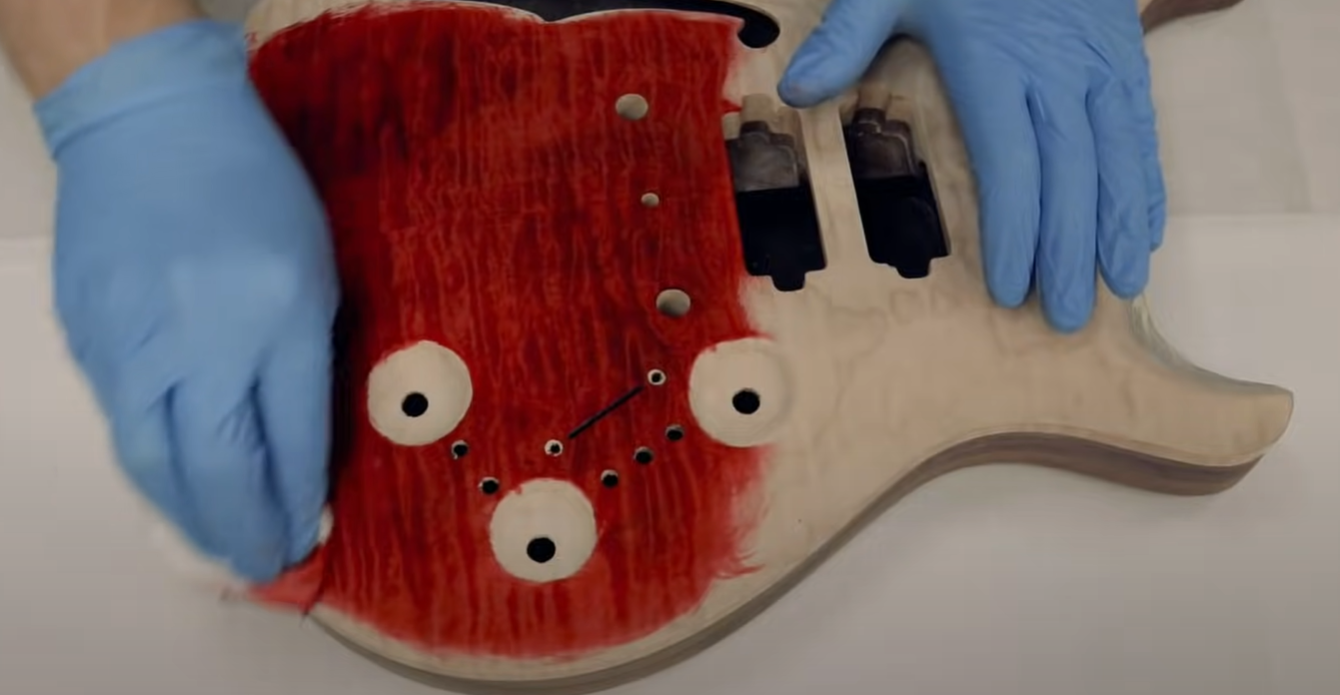
APPLICATION
To apply the pore sealer you can either use a cloth or a plastic card. Our preference is to use a cloth for its application and a plastic card to remove the excess while rapping. Collect the grain filler with your cloth and rub, pressing firmly in a circular fashion throughout your body (and handle, if you have decided to sublimate and fill the grain of your sleeve). The idea is indeed to fill the pores and you can imagine that you have to push the sealer into the pores, the interstices of the wood. Surface, wait 2-3min, no more, then scrape off the excess pore sealer from the wood surface with a plastic card provided. The goal is for the mouth to only pore in the interstices and thus maintain a smooth surface. It is preferable to grate perpendicular to the direction of the grain so as not to remove the filler lodged in the interstices of the veining. Then do the other surfaces in the same way. In more difficult-to-scrape areas you can use a clean cloth in place of a plastic card to remove excess sealer. Remember to treat the edges as well. These areas are easy to overlook.
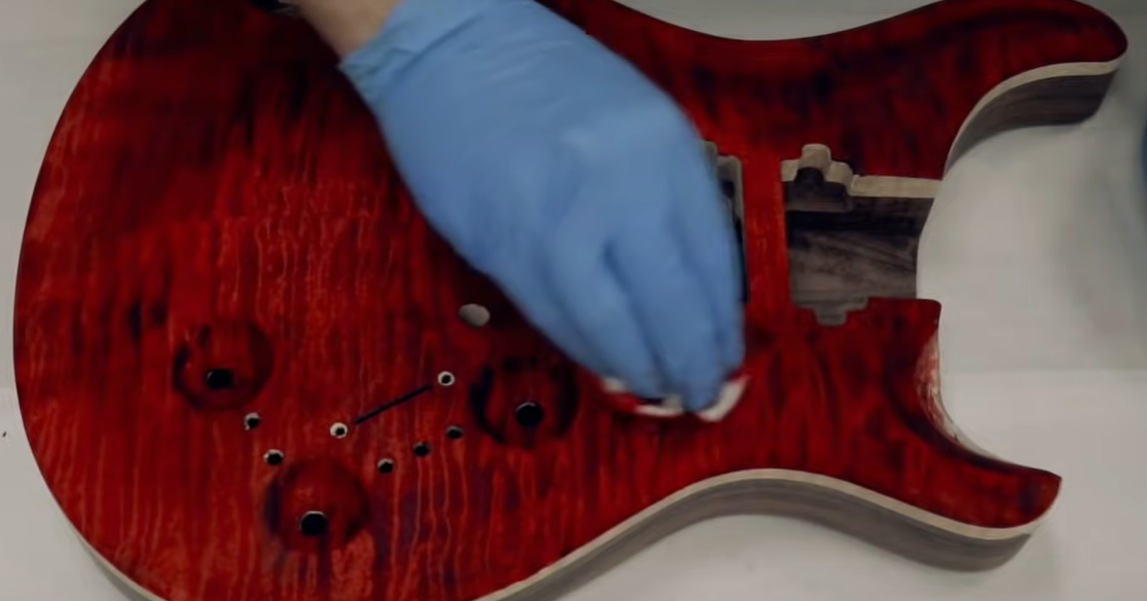
Once all the surfaces are done, let dry for 1 hour then sand with P400 grit sandpaper as defined in the previous section above. Be careful not to sand too much. You don't want to remove the sealer you just applied. Sand the edges carefully as well.
Finally, inspect your work. You can easily see if all of the pores are filled by looking at the surface at an angle, against bright light radiating obliquely toward the surface. If you missed any areas, you can always reapply wood filler.
From there you can do this a second time if you want to make some adjustment and further darken the grain, but in our experience this is not necessary. If you are satisfied then you will have to wait 24 hours to apply any finish after filling the grain.
Seal your work with primer: Once you are satisfied with your work, you can seal your current finish with a clear primer... This is not mandatory as the varnish will take care of it, but since you have some left…
NITROCELLULOSE SPRAY VARNISHING
General Information
Most store-bought electric guitars are finished with polyurethane, but we have opted to provide you with a nitrocellulose spray lacquer ( ). Nitrocellulose lacquer offers a traditional, vintage-style finish that enhances the natural resonance of the wood. However, it requires more care in application and longer drying times compared to water-based alternatives. Please keep in mind the following recommendations.
- Before starting the varnishing step, make sure your wood has been sanded to at least P400.
- Apply very thin coats to achieve an even and smooth finish.
- Applying nitrocellulose lacquer is a delicate process, so take your time.
- Unless you prefer otherwise, fretboards are typically left unvarnished. Instead, consider applying Tru-Oil or lemon oil for better playability.
- Inspect the surface carefully after each coat to detect any imperfections or drips.
Preparation
Before use, shake the nitrocellulose can thoroughly for at least 2 minutes. It is crucial to ensure the lacquer is well-mixed for an even application. Prepare your guitar body as described in the previous sections.
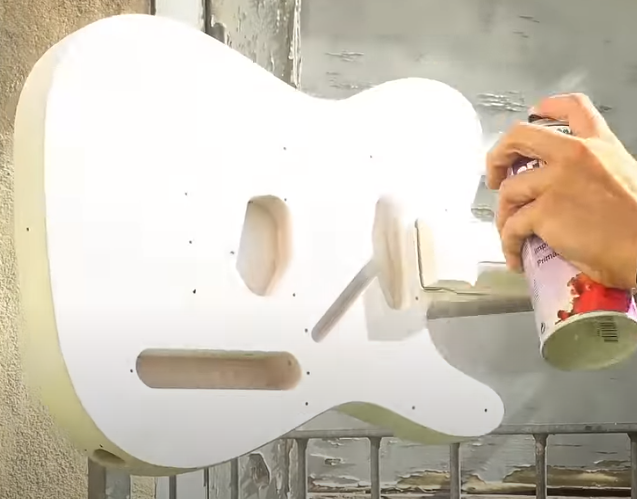
Application
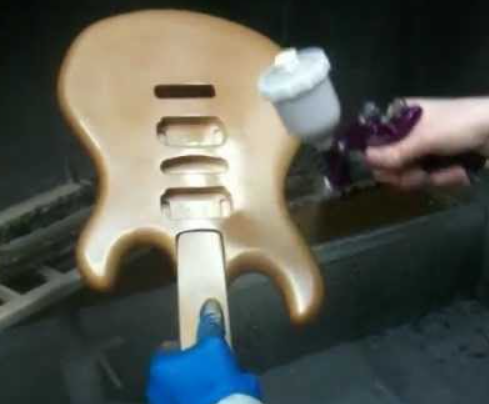
Apply the nitrocellulose lacquer in thin, even coats. Hold the can approximately 20-30 cm from the surface and spray in smooth, overlapping passes. Work in a dust-free, well-ventilated area, preferably with protective gear such as a mask and gloves. 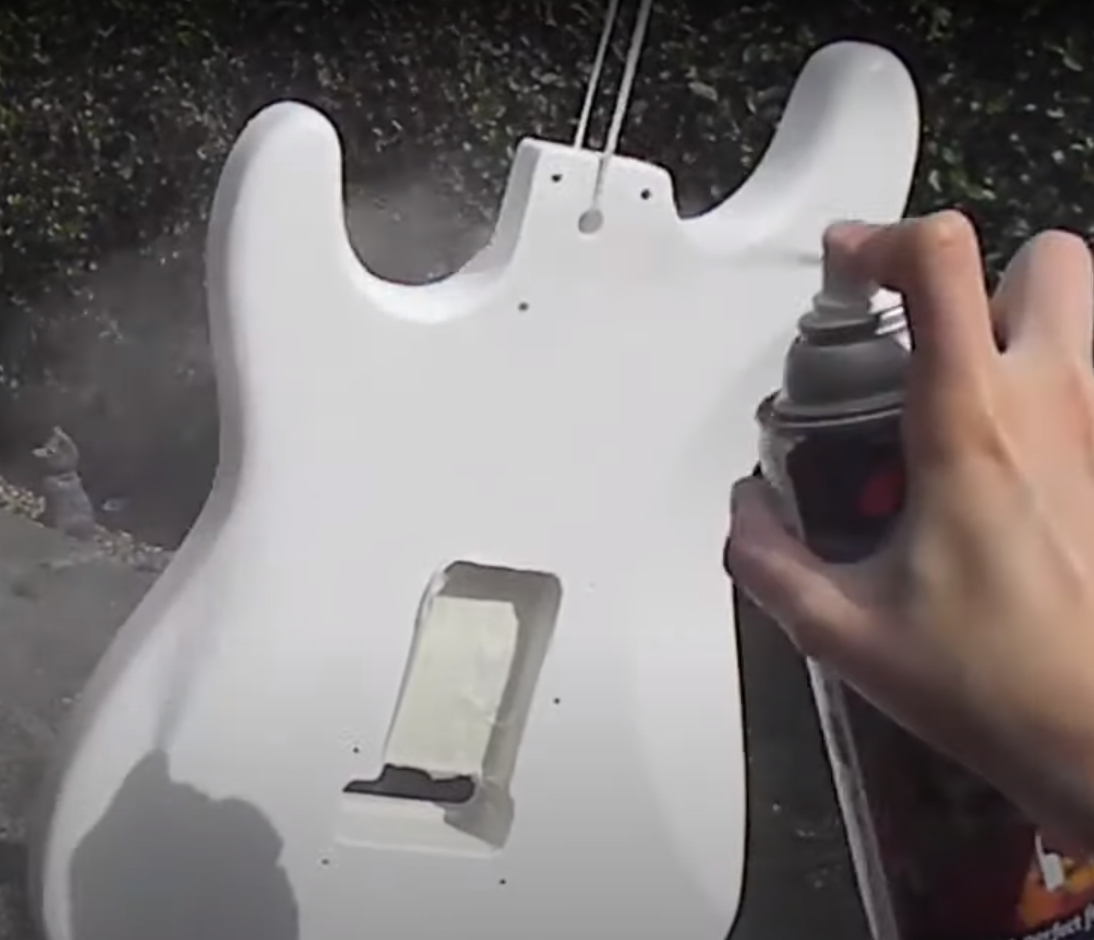
Always spray along the grain direction. Start with the top, then move to the sides and back. Allow sufficient drying time between coats to prevent defects.
For the first two coats, do not sand between layers unless you notice significant drips or orange peel texture. If needed, use P600 sandpaper for minor corrections. Ensure that each coat is completely dry before applying the next one. Given nitrocellulose's properties, drying times will vary depending on humidity and temperature.
For the third coat onward, allow at least 24 hours of drying time before sanding lightly with P800 sandpaper. This gentle sanding helps the next coat adhere properly and ensures a smooth surface.
The final coats should be applied with extra care. Let the lacquer cure for at least 7 days before proceeding to the final sanding and polishing steps. Below is a summary table of the varnishing process.
| Coats | Waiting Time (after one layer) | Type of sanding |
| 1st coat | 1 hour | None (P400 if drips or orange peel) |
| 2nd coat | 24 hours | P1200 light sanding |
| 3rd coat | 1 hour | None |
| 4th coat | 4 hours | P1500 light sanding |
| xth coat | 4 hours | No sanding (wait for curing) |
| Final coat | 1/2 day x number of coats | No sanding (wait for curing) |
Tip: You can also incorporate wet sanding instead of dry sanding for an even smoother finish. Use high grit waterproof sandpaper (P800–P2000), a sanding block, and clean water with a few drops of dish soap — it acts as a lubricant and helps prevent scratches. Soak your sandpaper in water for 10–15 minutes before use, and lightly moisten the guitar surface as well. Ideally, keep both sandpaper and surface damp while sanding. Gently sand the surface, and frequently wipe it down to inspect your progress. This reduces airborne dust and gives a finer result, but requires a delicate touch to avoid sanding through the finish layers.
Caution: Wet sanding is not suitable for Tru-Oil finishes: water can damage the oil layer and may seep into the wood. Always use dry sanding techniques when working with oil-based finishes. Also, never wet sand bare wood — this technique is meant for sealed, colored, or clear-coated surfaces only. Ensure the surface is completely dry before applying the next coat.
Want to dive deeper into the differences and best use cases for wet vs. dry sanding? Check out our full guide here.
Once all coats have been applied, let the lacquer cure completely. If you have applied 7 coats, allow at least 7 days before final sanding and polishing. The longer you wait, the better the finish will be.
After curing, remove the masking tape from areas such as the fretboard, nut, or bindings. If the bindings have absorbed some color, gently scrape them with a razor blade to restore their original appearance.
Note: This finishing kit does not include a final polish, which is optional. Even without it, you should achieve a smooth and glossy result. However, if you desire a higher shine, you can undertake additional polishing steps, including level sanding, polishing sanding, and buffing. These steps are beyond the scope of this guide.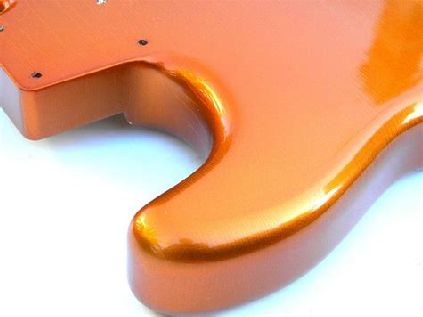
LUCIDATURA
INFORMAZIONI GENERALI
La lucidatura è facoltativa e, normalmente, anche senza questa, dovresti già aver ottenuto un ottimo risultato. Tuttavia, se desideri più lucentezza e una superficie ancora più liscia, ti invitiamo a intraprendere questo ultimo passaggio di finitura. La lucidatura può essere divisa in tre fasi: levigatura di livellamento per rimuovere gli ultimi difetti, levigatura per lucidatura e infine lucidatura. Questi passaggi saranno ulteriormente dettagliati di seguito. Inoltre, prendi nota:
- Fai sempre attenzione quando levighi, applicando una pressione molto leggera, specialmente vicino ai bordi. È facile rimuovere il vernice se premi troppo forte!
- Assicurati sempre di rimuovere tutta la polvere generata dal tuo ambiente di lavoro o dalla levigatura. Un'idea è utilizzare un ventilatore simultaneamente per rimuovere immediatamente la polvere.
- Di tanto in tanto, "picchietta" o strofina la tua carta vetrata su un tappetino per rimuovere la polvere incorporata.
- Per una finitura a base d'acqua, non carteggiare con acqua. Usa un metodo di carteggiatura a secco. Se carteggi con acqua su un vernice a base d'acqua che non si è completamente asciugato, potresti rimuovere leggermente lo strato di vernice.
- Quando usi l'acqua, usa sempre acqua a temperatura ambiente. L'acqua fredda può danneggiare e crepare la tua finitura.
Prima di iniziare, il legno dovrebbe essere stato già carteggiato con una grana P800 o P1000 nel passaggio precedente.
PREPARAZIONE
Prima di iniziare, avrai bisogno di carta vetrata a secco e umido nelle grane P1000, P1200, P1500, P2000 e P2500. Per la fase di levigatura, consigliamo di posizionare la tua chitarra su una superficie relativamente morbida, come un tappeto.
APPLICAZIONE – LEVIGATURA DI LIVELLAMENTO
Questo passaggio è necessario solo se hai ancora imperfezioni localizzate (come sgocciolamenti o rugosità significative). In questo caso, dovresti levigare fino a P400 per rimuovere le imperfezioni, poi passare a P600, P800 e P1000. Per la levigatura localizzata, la carta vetrata è più piccola e viene utilizzato un blocco di levigatura più piccolo — una gomma da cancellare funziona alla grande! — poiché è un processo di levigatura molto localizzato.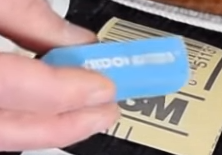
APPLICAZIONE – LEVIGATURA PER LUCIDATURA
Per la fase di lucidatura, fai riferimento alla sezione IV. Tuttavia, nota che questa volta dovresti applicare una pressione minima durante la levigatura. L'obiettivo è erodere la superficie, non rimuovere materiale, ma eliminare leggere imperfezioni superficiali create durante l'applicazione del vernice.
Inizia la levigatura con la grana P1000, poi passa a P1200, P1500, P2000 e infine P2500. Alcuni preferiscono continuare, ma non noterai una differenza significativa. Rimuovi sempre la polvere usando un ventilatore in funzione per evitare che graffi ulteriormente la tua finitura!
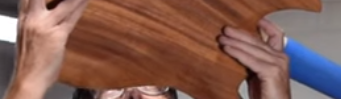
A questo stadio, dovresti avere una finitura leggermente sbiancata con i micro-graffi rimossi. Puoi vedere questo chiaramente posizionando il legno vicino a una fonte di luce e inclinando leggermente per creare riflessi che rendono questi graffi più visibili. Se vedi micro-graffi, ritorna alla grana P1000 e lavora fino a P2500.
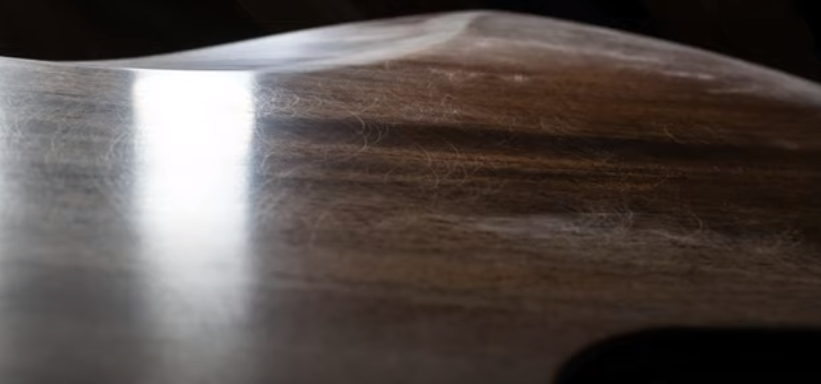
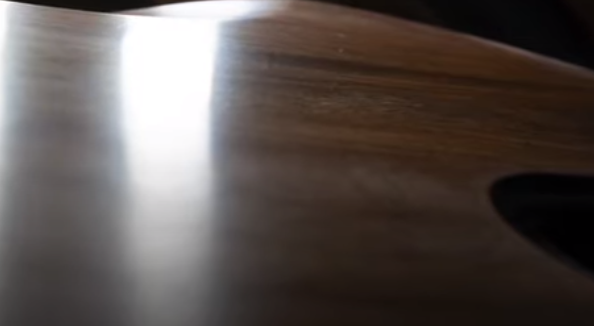
Prima (sinistra) & dopo (destra) la levigatura
Ora è necessario lucidare il legno per trasformare la superficie sbiancata in una finitura ultra-brillante.
APPLICAZIONE – LUCIDATURA
Questo è il passaggio finale, dove devono essere applicati prodotti aggiuntivi. Puoi usare detersivo per piatti mescolato con acqua o applicare prodotti di lucidatura dedicati, come quelli disponibili sul nostro sito web. In particolare, il nostro "kit di lucidatura" contiene tutto il necessario per levigare, lucidare e lucidare a mano (un'apposita guida per la lucidatura con questo kit di finitura è anche inclusa). Naturalmente, l'utilizzo di prodotti specificamente progettati per la lucidatura delle chitarre offrirà risultati molto migliori.
Il prodotto lucidante scelto può essere applicato a mano o con una macchina.
A Mano:
Consigliamo l'uso di panni in microfibra. Strofina in movimenti circolari, applicando una leggera pressione. Risciacqua e continua fino a quando non sei soddisfatto del risultato.
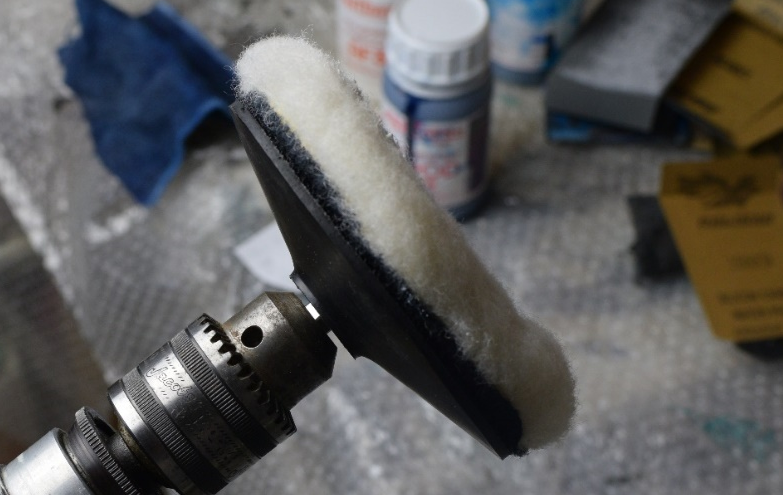
A Macchina:
Esistono macchine di lucidatura dedicate, ma puoi facilmente trovare un attacco per il tuo trapano che consente una lucidatura efficiente del legno. Se utilizzi una macchina per migliorare la lucentezza, fai attenzione a non surriscaldare la superficie a causa dell'attrito rapido. Il calore generato dall'attrito può danneggiare la tua finitura. Nota che alcune aree saranno inaccessibili con la macchina, nel qual caso, lucida quelle aree a mano.
Nota:
Durante questo processo finale di lucidatura, è consigliabile indossare una maschera respiratoria e occhiali protettivi, soprattutto quando si utilizza una macchina di lucidatura. Particelle di prodotto di lucidatura saranno spruzzate nell'aria.
Thank you for following our tutorial! Feel free to check our products: &
Related Products
Dal 49,88 € Regular Price 55,43 €
Al 190,37 € Regular Price 231,81 €
Dal 69,93 € Regular Price 79,49 €
Al 175,85 € Regular Price 205,38 €
Dal 73,59 € Regular Price 79,49 €
Al 172,23 € Regular Price 195,95 €
Related Posts
- The Guitar Fabrik
- 27 giu 2025
- 294views
IBANEZ CUSTOM BASS SHOWCASE
- The Guitar Fabrik
- 29 mag 2025
- 423views
B.C. RICH CUSTOM GUITAR SHOWCASE

- The Guitar Fabrik
- 1 mag 2025
- 176views
MUSIC MAN CUSTOM BASS SHOWCASE
- The Guitar Fabrik
- 28 apr 2025
- 725views
RICKENBACKER CUSTOM GUITAR SHOWCASE
Related Products
Dal 49,88 € Regular Price 55,43 €
Al 190,37 € Regular Price 231,81 €
Dal 69,93 € Regular Price 79,49 €
Al 175,85 € Regular Price 205,38 €
Dal 73,59 € Regular Price 79,49 €
Al 172,23 € Regular Price 195,95 €
Recent Posts